Create a case |

|

|
|
Create a case |
|
|
Create a case |
|
|
|
Create a case |
|
|
Usage:
Case Entry – Using streamlined processes and intuitive interfaces, entering cases into the DLCPM system has never been easier or faster. Based on any product codes and descriptions your lab chooses, employees can easily enter all pertinent case information including Product Code, Tooth Numbers, Materials, and more.
Before you start creating cases please make sure that you have completed all of the necessary settings and you have created all of the data that you might need to fill in when a case is created. For this you may want to check first How to set up data for creating cases.
Navigation:
A New case can be added by following different paths. However all steps to create the case are the same, only difference is the navigation to Case entry form.
The application offers two browse options with the aim of creating a case.
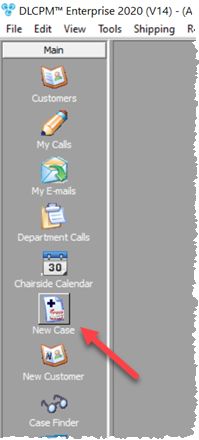
You can: 1.Click on ➢ New Case icon in Main menu
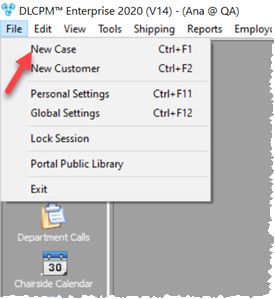
New Case option on Main menu ➢ or on New Case in File menu
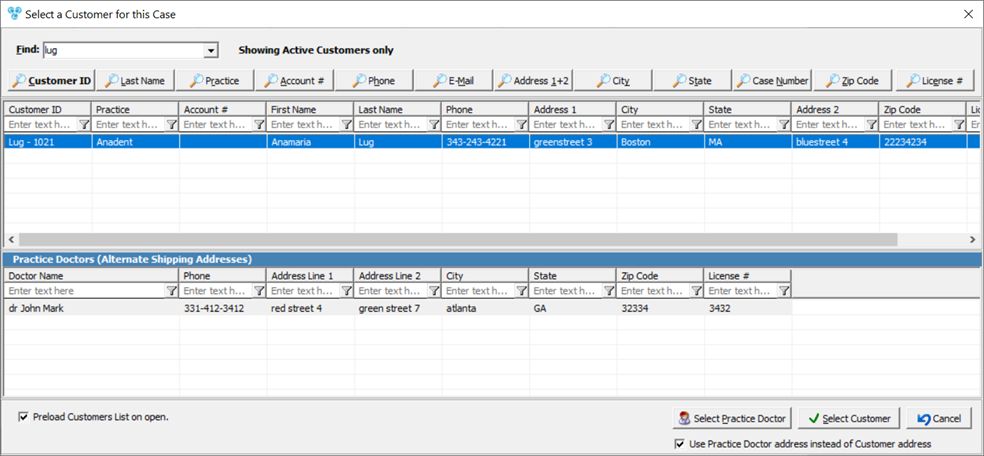
New Case option in File menu ➢or simply click on CTRL+F1 2.Select the customer for which you want to add a new case
Select Customer form |
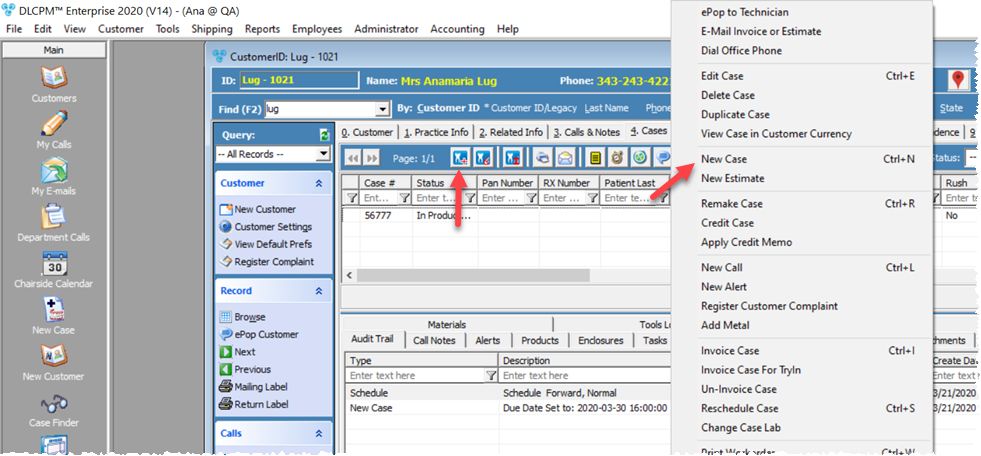
Or 1.Open the Customer form 2.Select the customer for which you want to add a new case 3.Select the fourth tab on Customer form called Cases 4.Click on the
Customer form with Cases tab opened
|
Either way you have to get to the New Case form in order to create a case.
The New Case form has several fields populated by default with data entered previously in different screens of the application. (like: Doctor name, Production and Invoicing Lab, and several Dates including Ship date and Due date)
Without entering any other information you can click on the ![]() button, the form will close and the case will be created.
button, the form will close and the case will be created.
How to add data like Products or Enclosures, Materials or how to Remake, add Discounts or Invoice, as well as all other operations that can be done using cases is detailed in different topics. Please go back to Cases topic and choose the operation you would like to do in order to see details about how it can be done.
Clicking on ![]() will close the existing New Case form and also open another New Case form in order to create another case.
will close the existing New Case form and also open another New Case form in order to create another case.
New cases that are created get an assigned number and also the default status that is set in File > Global Settings > Global > Case Options. All cases will be displayed on the Cases form in the grid.
See also: