Add Enclosures to a case |

|

|
|
Add Enclosures to a case |

|

|
Usage:
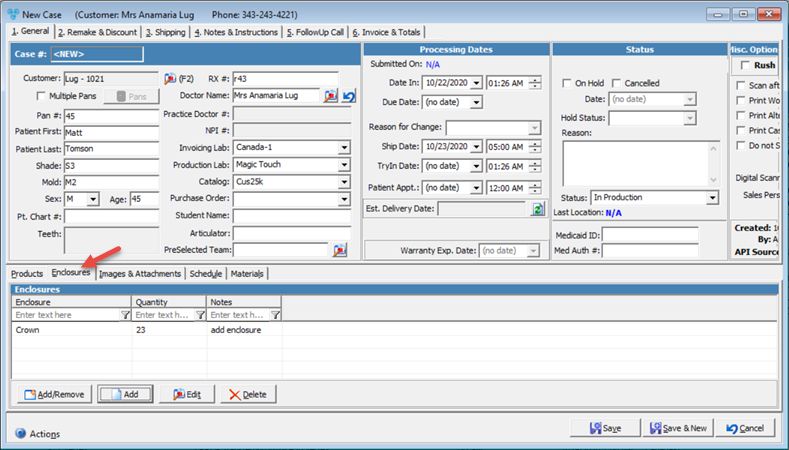
Case Enclosures, also referenced as Materials, are items that you may have received along with the Case. It is strongly recommended that the enclosures are tracked by adding them in the appropriate section during the Case Entry process. Each item may also include notes describing the condition of the enclosure as needed.
Before adding any enclosures make sure that these are added to the application in the File > Global Settings > Global > Laboratory Lists > Enclosures. Otherwise you will not be able to add them to the case.
Navigation: Customer > 4. Cases
Create or open a case for edit. For more details about creating a case see How to create a case section.
In this topic a new case is created but the process is the same using existing cases that are not invoiced. An Invoiced case cannot be updated.

New Case form with Enclosure tab
1.Edit On the Case form, click on 1.General tab, select Enclosures tab, and click the record you want to update. 2.Click 3.Make the changes on Case Enclosure form. 4.Click Note: You can also modify enclosures using |
1.Select the Enclosure you want to remove by clicking on it in the Case form on 1.General tab, then select Enclosures tab 2.Click 3.Click on Yes when confirmation is asked Note: You can also delete enclosures using |
See also: