Images and Attachments |

|

|
|
Images and Attachments |

|

|
Usage:
Case Attachments – Along with case materials, doctors may choose to provide electronic files, such as images, documents, etc. and now they can easily be attached to the case with just a few clicks.
This topic describes how to add and maintain Images and Attachments to a case number. You may capture multiple images during or after case entry. You may add attachments, Scan documents, and Capture images at the same time. Images can be also saved on customer attachment form and assigned later to a case number. Details about this second option are displayed in How to assign Case Number to an Attachment
Navigation:
Files can be added:
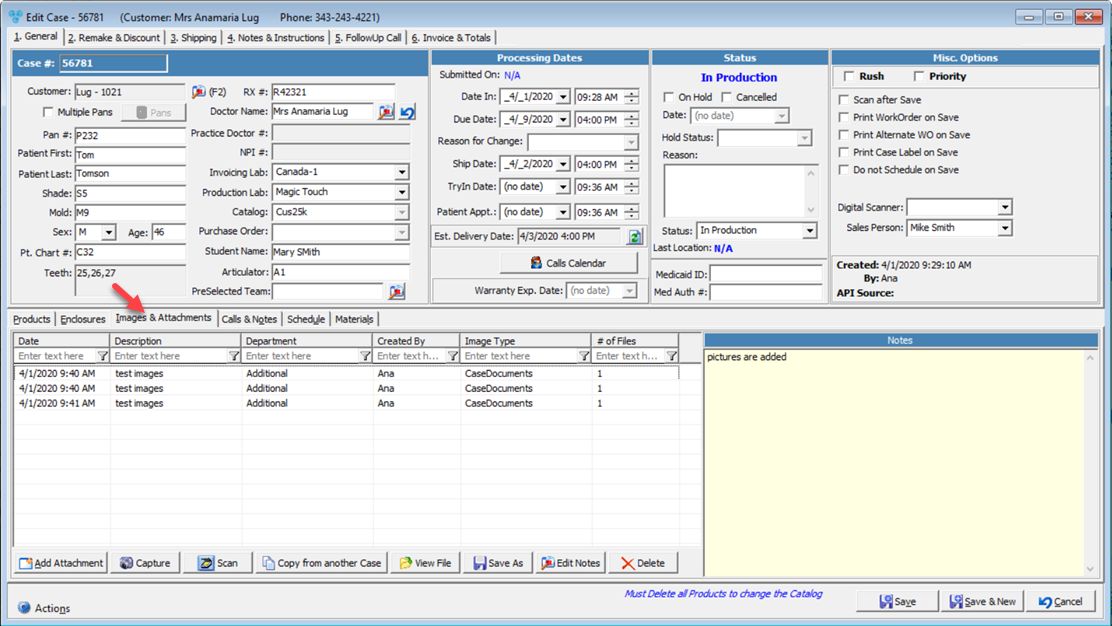
➢Directly to a case while adding or editing it by navigating to: Customer > 4.Cases > Images and Attachment tab > Add or Edit case number.

Images & Attachment tab on Cases form
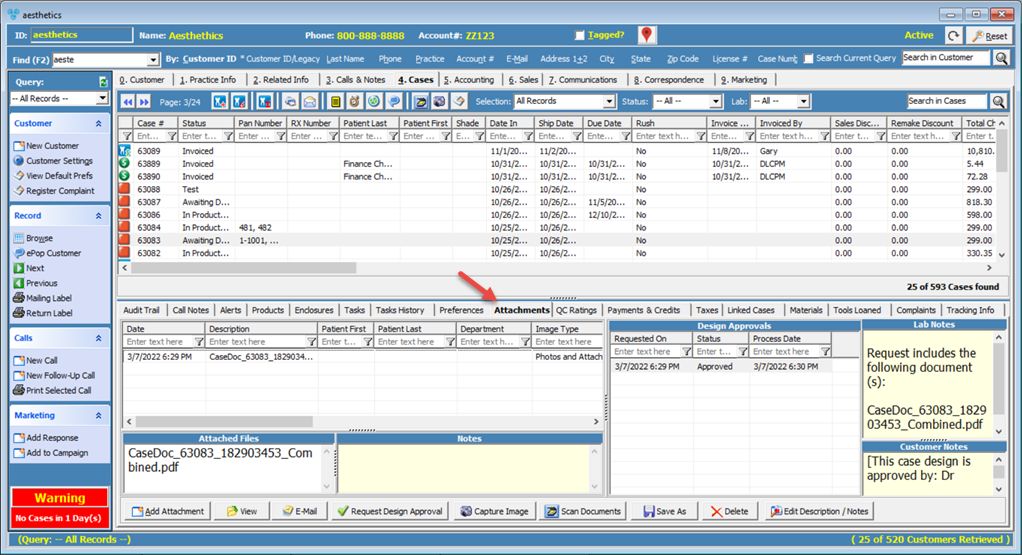
➢Images & Attachment tab on Cases form after the case was created by navigating to Images and Attachment tab on the Customer > 4. Cases form

Attachment tab on Case form
➢or by assigning an attachment from Customer > Attachments form to an existing case number. Details about this second option are displayed in How to assign Case Number to an Attachment
Available options:
1.Follow one of the above navigation paths get to the Images & Attachment tab 2.Click on 3.On Add Photos and Attachments form •Enter Patient Name •Enter Description. •Enter Department •Select Repository to choose the image type such as Model, Design, Impression, or standard documents. •Do Not use Compression - check if you wish that the files will NOT be compressed. Compression is used to alter files to a version that is smaller in size and would save disk space. Please note: regardless of whether this checkbox option is checked or not, the server will skip compression for known zip files such as .zip, .z, .jpg, .jpeg, .tiff. •Select the Files you want to add by clicking on the icon next to the fields and browsing until desired file is reached. Six files can be added at once. This is handy for Labs that store documents/images offsite. When a URL is added, the •Allow Customer to view in Customer Portal - allow sharing saved images with the customer in the Customer Portal. •Sync to Digital Gateway •Enter Notes Note: CustomerID, Case number and Patient Name cannot be changed during an image attachment. If the Customer or the Case number is not the right one, you have to close this form, select the correct customer and case number and start again with the above steps. 4.Click |
This option allows you to capture multiple images during or after case entry. You may add attachments, Scan documents, and Capture images at the same time. When entering a new case, navigate to the Attachment tab. You may also find the toolbar button on the Case list or Case Finder 1.Following one of the above navigation path get to theAttachment tab 2.Make sure you have a device attached to your computer to be able to capture images with it 3.Click on
Capture Image form 4.Select Video Source 5.Set Resolution 6.Select Department 7.Enter Description 8.Click on 9.Picture is captured and saved. You can capture as many pictures as you need to attach. 10.Enter Notes. 11.You may Allow Customer to View in Customer Portal 12.You may Allow Vendor to View in Lab Customer Portal 13.Click OK to attach the captured images to the selected case. |
1.Following one of the above navigation path get to the Attachment tab 2.Click on 3.On Scan Case Document form •Select Scanner •Select Image Format •Select Resolution •Select Department •Enter Notes and Description •Allow Vendor to View in Lab ConneX Portal - if checked then document can be viewed in Lab ConneX Portal •Allow Customer to View in Customer Portal - if checked then document can be viewed in Customer Portal 4.Click Scan. Image details will be displayed as records in the grid. |
Other options:
1.Following one of the above navigation path get to the Attachment tab 2.Click on the line that has the file you want to open. 3.Click on |
1.Following one of the above navigation path get to the Attachment tab 2.Click on the line that has the file you want to save. 3.Click on |
1.Following one of the above navigation path get to the Attachment tab 2.Click on the line that has the file that you want to update by entering new notes. 3.Click on 4.Enter text in Case Attachment Notes form that opened and click OK when done. New Notes and Description will be displayed in the yellow text field when the attachment is selected. |
1.Following one of the above navigation path get to the Attachment tab 2.Click on the line for which you wish to request design approval. 3.Click on 4.Enter email address to whom you want to sent the request. 5.Select the Case Status 6.Add Notes to Customer 7.Click 8.Once the design is approved , record is saved in Design Approvals section.
Design Approvals section. 9.Using right click menu you may Delete the Design Approval Request. |
1.Following one of the above navigation path get to the Images & Attachment tab 2.Click on the line that has the file that you want to delete. 3.Click on |
See also: