Customer Attachments Maintenance |

|

|
|
Customer Attachments Maintenance |

|

|
Usage:
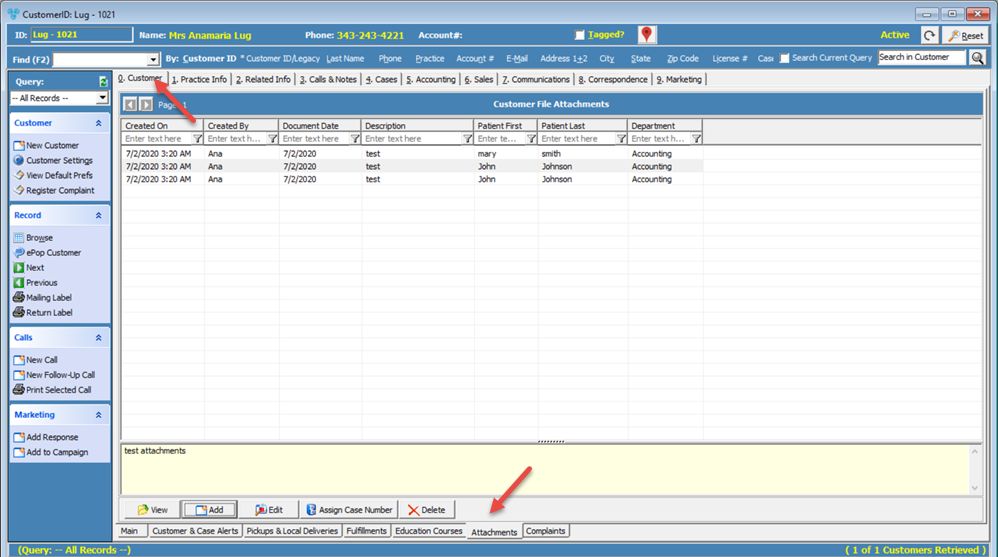
Displayed on the Customer Attachment form are all documents and files that are not attached to a case. Once a case is assigned to any document, the document will no longer appear in the Attachments grid.
Navigation: Customers > Customer tab > Attachments

Customer Attachments tab
1.On the Customer Attachments form click on the 2.The Add Customer Attachment form will display. 3.Fill in information such as: Document Date, Description, Patient Name and Department. 4.To add the document, there are three different options to choose from: ➢Select Document - With this option up to 6 files can be attached at once. Also, the files can be selected by clicking on the envelope icon next to each field and selecting the document that will be attached. ➢Scan Document Now - This option allows the user to Scan as many documents as needed. All scanned documents will be displayed in the Document File field. ➢ Print Label and Scan Later - When entering customer attachments, support has been added for automated scanning and image entry. Choosing the last radio button will print a designated barcode that should be pasted to the document to be scanned. 5.The Notes section is available for entering any specific information, notes, and clarification. 6. When all documents are uploaded or scanned click Save and the files will be attached to the customer record as well as display in the grid on the Attachments tab. |
1.Click on the line in the grid which contains the attachment that will be viewed. 2.Click on |
1.Click on the line in the grid which contains the attachment for editing. 2.Click on 3.Make any necessary changes to the General and Notes section 4.Click OK and the changes will be saved. |
![]() How to assign Case Number to an Attachment:
How to assign Case Number to an Attachment:
To assign the Attachment to a case number you must have at least one case that is not Invoiced. For details of how a case is created please see How to create a case topic. DLCPM offers two ways of navigation to Assign a Case Number to an Attachment:
Please Note: By selecting the second navigation option (opening Unassigned Case Attachment form through Tools menu) all unassigned documents for all customers are displayed in the grid, unlike the first way when documents are displayed only for one customer, the one that is already selected. For this reason on the Unassigned Case Attachment form we have the View Customer button that will open the Customer form and will display details for the customer of the selected attachment. 1.After selecting the attachment which will be added to a case number by clicking on it in the grid, Click on the 2.Enter the Case Number on the Assign image to Case form and click OK. 3.The Image will then be assigned to the case number and will be removed from the Attachment form. 4.To view the assigned image navigate to either: ➢Customer > Cases > Click on the case number that had been entered on previous step > Click on the Images and Attachment tab Or ➢Customer > Cases > Open the case number that had been entered on previous step > Click on the Images and Attachment tab |
1.Click on the line in the grid that contains the attachment which will be deleted. 2.Click on 3.Select Yes when asked for confirmation. |
See Also: