Assign CaseID to Attachments |

|

|
|
Assign CaseID to Attachments |
|
|
Assign CaseID to Attachments |
|
|
|
Assign CaseID to Attachments |
|
|
Usage:
In the event you have uploaded or scanned an attachment to a customer record and would like to assign it to a case, you may use the Assign CaseID to Attachments option. For details of how a case is created please see How to create a case topic.
Navigation: Tools > Assign Case Number to an Attachment
Please Note: You may also Assign Case Number to an Attachment by navigating to Customer > Attachments . Details are presented here.
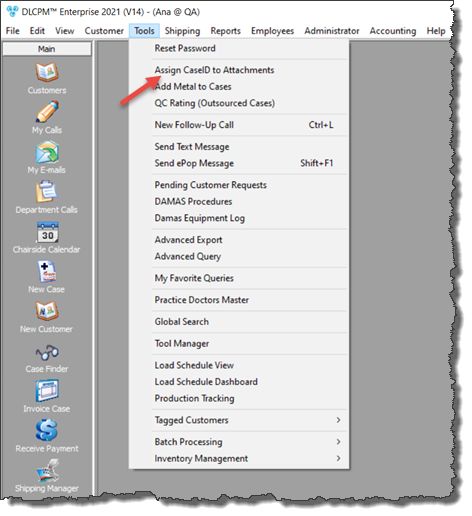
Assign Case ID to Attachments navigation
Following form will open:
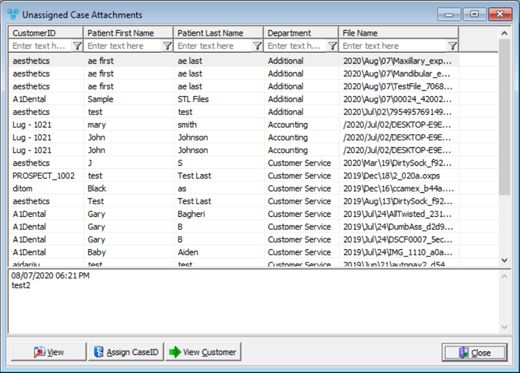
Unassigned Case Attachment form
Please Note: All unassigned documents for all customers are displayed in the grid, which is different from the Customer form when documents are displayed only for the customer that is selected. For this reason on the Unassigned Case Attachment form we have the View Customer button which will open the Customer form and will display details for the customer of the selected attachment.
1.After selecting the attachment which will be added to a case number by clicking on it in the grid, Click on the ![]() button.
button.
2.Enter the Case Number on the Assign image to Case form and click OK.
3.The Image will then be assigned to the case number and will be removed from the Attachment section.
4.To view the assigned image navigate to either:
➢Customer > Cases > Click on the case case number that has attachment > Click on the Images and Attachment sub-tab
Or
➢Customer > Cases > Open the case number that has attachment > Click on the Images and Attachment tab
See Also:
Attachment tab on Customer form for more details.