Usage:
DLCPM allows you to setup one billing account for multiple customer accounts. This feature is designed for accounting purposes only and has no impact on case entry and production data. With Billing Accounts configured for a customer, all statements and invoices are to be sent to one main billing address. An option has been included to allow statements to be combined or generated individually.
Navigation:
Either
Open the Customer form in order to have access to the Customer menu and select Customer > Accounting > Billing Accounts
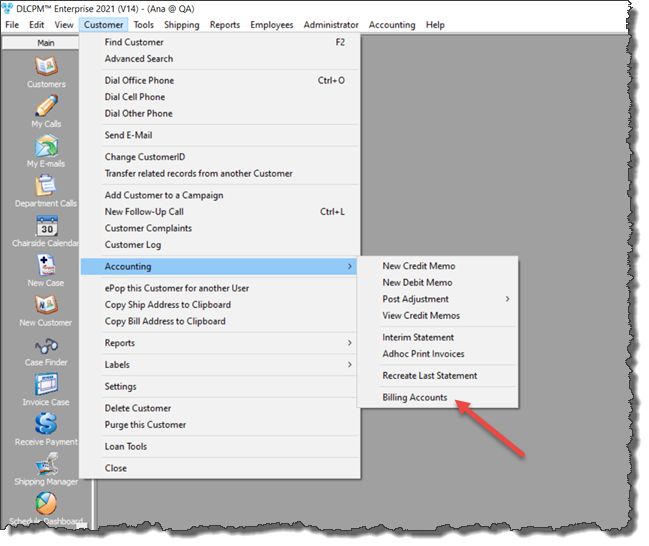
Billing Accounts navigation
|
Or
Accounting > Billing Accounts
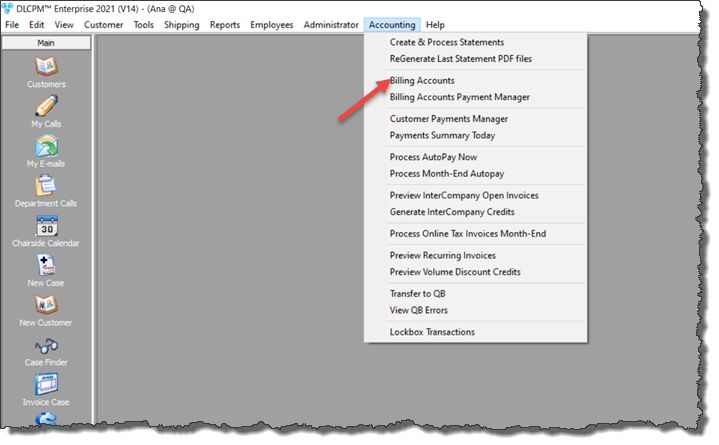
Billing Accounts navigation
|
The Billing Accounts form will display:
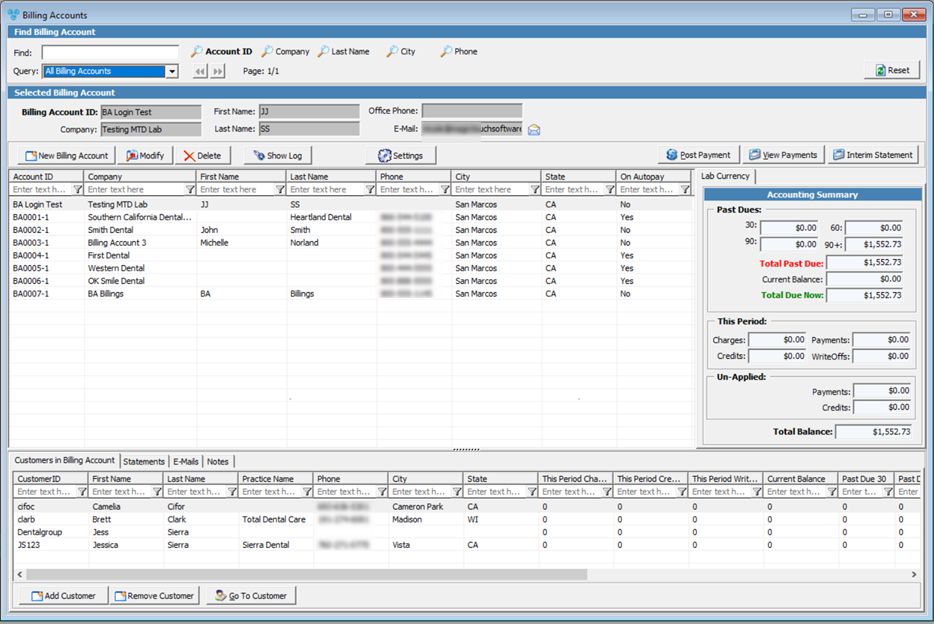
Billing Accounts form
Available operations:
•Find an existing Billing Account:
•Add Billing Account
•Modify Billing Account
•Delete Billing Account
•Customer in Billing Account
•Statements
•E-mails
•Notes
Some options are available to setup for customers. Access Setting option form more details.
1.Find the account you wish to setup 2.Click on  3.The first tab is Billing Accounts Credit Card. You can Add/Edit or Remove Credit Cards that will be used for payments. Details of these operations are described in this topic. 4.Next is Automatic Payment Configuration. ➢Set this Customer to AutoPay ➢Select the Credit Card for processing the payment ➢Select when to process payment: Monthly (select the day), Semi-Monthly (Payment will run on 1st and 16th of each month) , Weekly (select a day) or Daily. ➢Select what to charge when Processing Payment 5.When setting up Auto-Pay for Billing Accounts, you need to insure that none of the associated Customers are set for Auto-Pay. Unless intended and depending on the Auto-Pay settings, Customers may be charged multiple times. 6.You can Remove Auto-Pay from Associated Customers by clicking on the corresponding button and selecting Yes when asked for confirmation. |
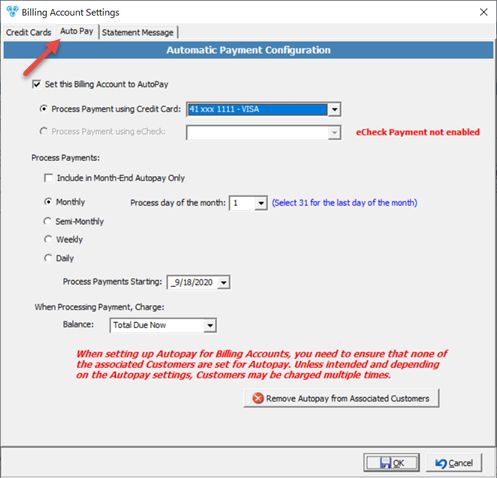
Automatic Payment Configuration
|
|
Show Log option allows viewing the Auto-Pay payments and other information.
1.Select the Account Id in Billing Account form 2.Click on  3.Billing Account Log form displays. 4.You can modify the date range to see info from much earlier dates. |
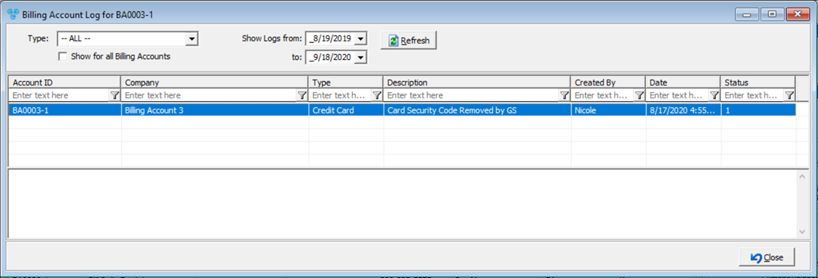
Billing Account Log
|
|
Post Payment option is to allow posting payment for all the customers associated with a given Billing Account
1.Select the Account 2.Click on  3.Posting a Billing Account Payment is similar to the individual Post Payment form. The only difference is that the Billing account information displays instead of the individual Customer's and on right panel will list all customers that correspond to the selected account. To make the payment follow the steps from Post Payment form, excepting that you will also need to make note of which Customer you are selecting and not only the case number.
|
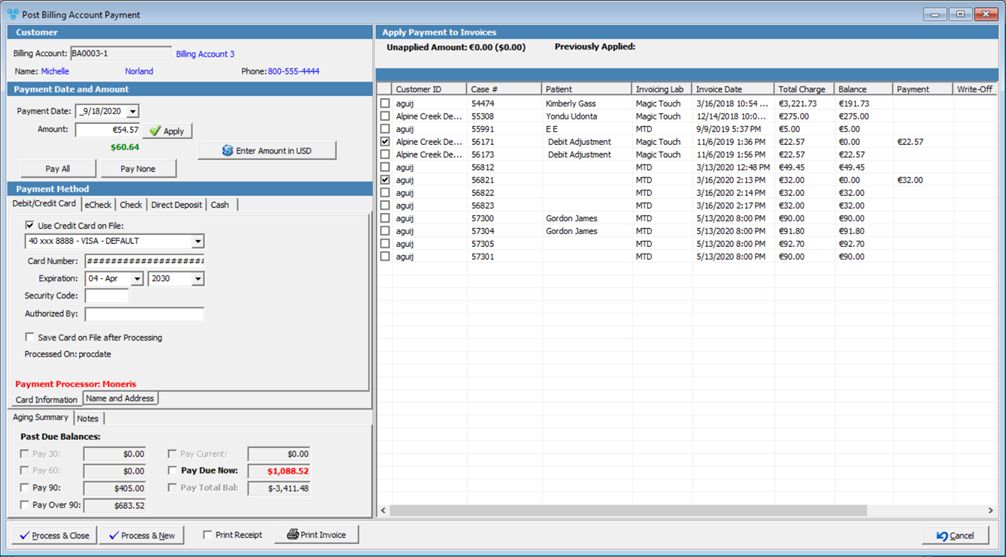
Post Billing Account payment
|
|
View Payments is available to verify or delete payment history for a selected billing account.
1.Select the Account 2.Click on  3.Billing Accounts Payment form displays with the processed payments. 4.You have a Query, a date range option and three payment types available to search for payment you need. 5.You may remove a payment by selecting it , clicking on  and selecting Yes when prompted for confirmation. and selecting Yes when prompted for confirmation. |
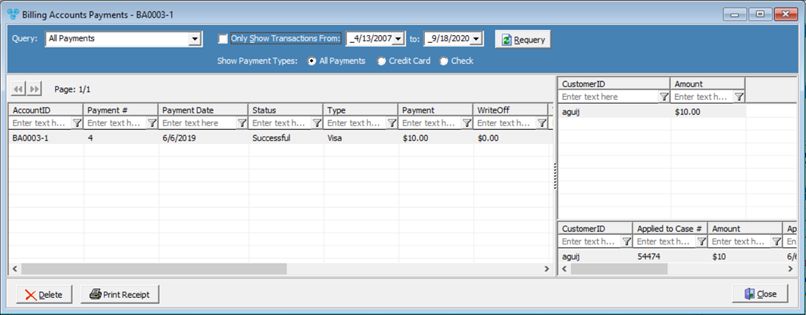
View Billing Account payment
|
|
See also:
Billing Accounts Payment Manager
How to Post a Payment
How to create Statement


