Tag Customer |

|

|
|
Tag Customer |
|
|
Tag Customer |
|
|
|
Tag Customer |
|
|
Usage:
Tagging a customer is a quick way of highlighting the customers that you may need to work with at a later time. Think of it like small sticky notes that are placed in between document pages for a quick retrieval of those pages when needed.
Example 1:
You are working with a customer record and have to jump to another customer to answer the phone, but you need to come back to the account later to complete the task. Simply check this box before switching to the other record.
Example 2:
You are browsing through a list of customers and would like to Call, Print Letter, or Email some of them based on a criteria. As you navigate through the records, simply check this box for later retrieval.
Navigation: Customer form
You can access the Customer form by:
•Clicking on the Customers icon in the left Menu tab.
•Navigating to View > Customers.
•Pressing the F3 key on your keyboard.

Tagged option
![]() What happens after the customer records are Tagged?
What happens after the customer records are Tagged?
After the records are tagged, you can filter the list of customers by using the My Tagged Customers query from the query drop down list.
|
In addition to viewing the tagged records, you may find the following application useful.
![]() Print a list of my Tagged Customers
Print a list of my Tagged Customers
1.On the Customer form, click on the Query drop down list. 2.Under the Common folder, select My Tagged Customers. 3.Navigate to Customer > Report > Customer List for Current Query. 4.Run Report. |
![]() Print a label for my Tagged Customers
Print a label for my Tagged Customers
1.On the Customer form click on the Query drop down list. 2.Under the Common folder, select My Tagged Customers. 3.Navigate to Customer > Labels > Current Query (Mailing 30252). 4.The label is printed. |
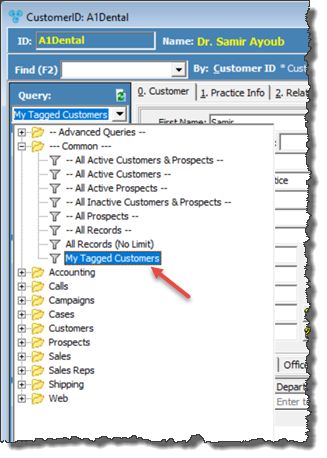
Another situation that may occur is you may have tagged some records for a Customer Service Rep to follow up with the customers or a Sales Person to visit the Doctor. For scenarios like these, you can create follow up calls based on tagged records. 1.Click on Automated Services from the left panel. 2.Click on Retention Calls. 3.From the query drop down list, select My Tagged Customers.
Create Follow-up Calls for tagged customer 4.The number of customers in this query is displayed. 5.Select other options such as user, department, call type, and description as needed and click the 6.This will automatically create follow up calls assigned to the designated user. |
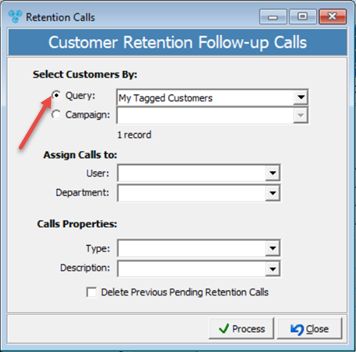
To print a letter for tagged customers, follow these steps: 1.Navigate to the Marketing menu from the left panel > Mass Printing. 2.Select the desired Word Document. 3.From the query drop down list, select My Tagged Customers.
Print letter for tagged customer 4.The number of customers in this query is displayed. 5.Enter the description and other options as needed. 6.Click the 7.This will automatically print the document for the customers that were previously tagged. |
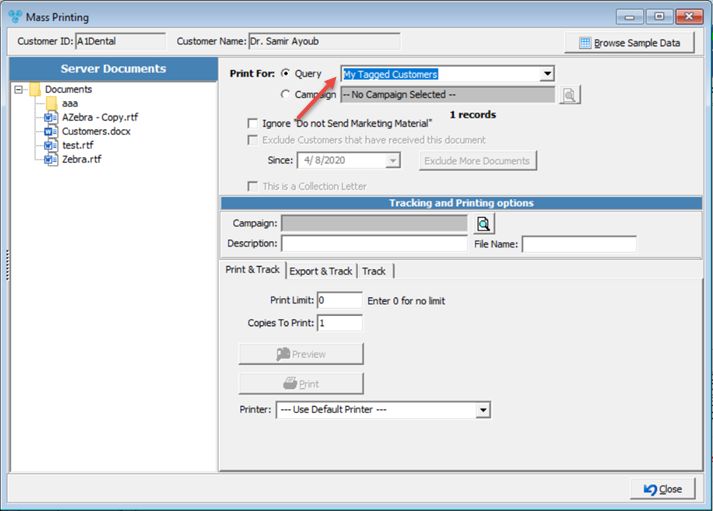
To send a broadcast email to tagged customers, follow these steps: 1.Navigate to the Marketing menu from the left panel > Broadcast Email. 2.From the query drop down list, select My Tagged Customers.
Send E-mail to tagged customers 3.A number of customers in this query are displayed. 4.Compose the email accordingly. 5.Click the 6.This will automatically send the Email to all the customers that were previously tagged. |
|
See also: