Customer Special Prices Settings |

|

|
|
Customer Special Prices Settings |

|

|
Usage:
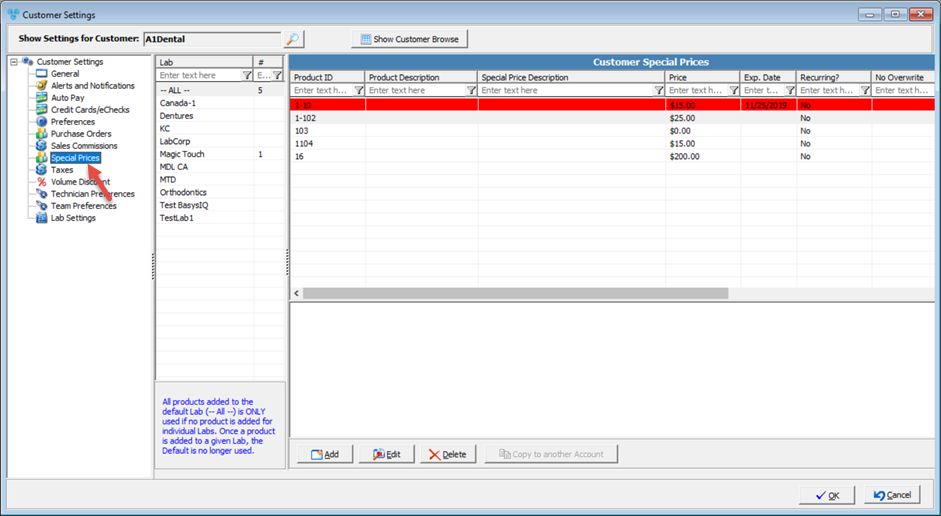
The Customer Special Prices form was designed to allow users to sell products with different prices depending on the customer, without changing the default Product price. It also allow setting a product with a special price discount. The discount will be automatically applied each time the product is entered onto the case. This allows for companies to display the special price the customer is receiving through the form of a discount versus displaying the special price.
Please Note: Each of these settings will have effect ONLY for the selected customer. The Customer Settings form is not available unless a customer is previously selected.
Prerequisites:
In order to be able to set values in all available fields, please make sure you have data entered on following table:
•Products -> Path: File > Global Settings > Global > Products & Tasks Lists > Products
Navigation: Customer > Settings > Special Prices

Customer Settings - Special Prices menu
1.Click
Add Special Price 2.Select the Product from the drop down list. 3.Select the offer between Special Price or Apply Discount •Special Price ➢Enter Special Price. ➢You may select to Do not allow to overwrite the price in case you do not want to allow price changes for this product. ➢If you select Do not allow Discount then Discount cannot be applied to this product when is added to a case. •Apply Discount ➢Select Discount. ➢Discount Reason - When setting the special price with a discount, the option as well as a reason must be selected and is what will populate by default each time on product entry. ➢You may choose to Not allow to overwrite the discount. Please note that Discounts with the setting "Multiply by Qty" enabled, would not be available. 4.Discount Expiration - set the date when this offer will end. •Select the Expiration Date - the date when this offer will end, or •Expire after ... Units entered - will expire special price discount after a specified number of units. Once the specified number of units is applied using the listed discount, the discount will expire and will no longer apply on the product. A date field has been added to set when the system should Start counting the Units from a specific date by the date in of each case. Units from all cases are counted regardless of case status. 5.The Special Price Result is the result explanation box that will outline what will occur with the product on entry and what will display on the invoice. 6.Check the Include in Monthly Recurring Charge - This option provides a method to automatically generate invoice on a monthly basis for services such as monthly support fee or other subscription fees. The process utilizes the customer special pricing option and it is fully automated. 7.Enter Quantity. 8.Enter Reference. This Reference will appear on the Invoice and Statement. 9.Click
Note: At any time during the month, you can Preview Recurring invoices by clicking on the Accounting Menu and select the Preview Recurring Invoices option which will show the invoices that will be generated. At the end of the month, when creating statements, you have the option to preview them again and optionally skip the recurring invoices for that month. Once the statements are created, you will not be able to generate them for that month. |
1.Select the Product you wish to update by clicking on it. 2.Click 3.Make any necessary changes. 4.Click |
1.Select the Product you wish to delete by clicking on it. 2.Click 3.Select YES when prompted for confirmation. Please Note: The record will be deleted from the database, but you may add it back at any time. |
1.Select the Product for which you would like to add a note by clicking on it. 2.Enter text in the area below the grid. 3.Click on the |
This option allows copying the special prices from one Customer to another. 1.Select the Product you wish to copy by clicking on it. 2.Click 3.Select YES when prompted for confirmation. |
See also: