Customer, Call and Case Alerts |

|

|
|
Customer, Call and Case Alerts |
|
|
Customer, Call and Case Alerts |
|
|
|
Customer, Call and Case Alerts |
|
|
Usage:
Customer, Call and Case Alerts are created with the purpose of sending instant messages automatically when certain actions are performed. For example, one may set an alert to pop up every time a new case is entered, or when a specific case is invoiced. This form provides an easy way to create all different types of alerts.
Note: Case Alert can be set on other forms too:
•You can also create an alert while adding a call - see Add/Edit/View Calls for details.
• Or create an alert for a specific case on the Cases form - see Add Case Alerts for details.
Navigation: Customers > Customer & Case Alerts
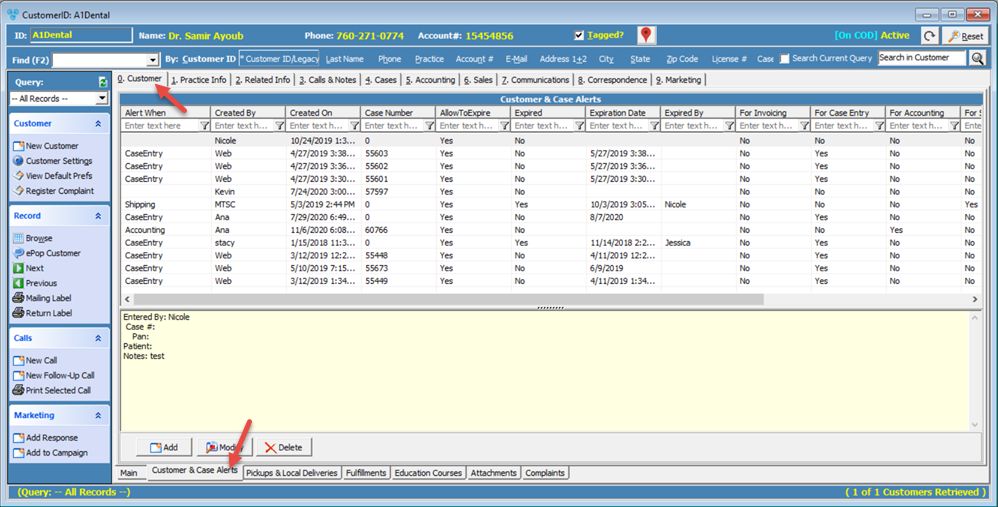
Customer and Case alert form
1.On the Customer & Case Alerts form click on the
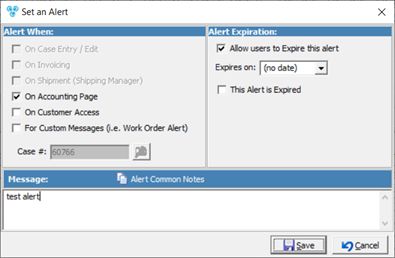
Set an Alert form is opened 2.Once this form is open, there are several types of alerts that can be set: ➢ On Case Entry/Edit - This alert will display each time a case is created on the customer record. Entering a Case number is not mandatory, however if the field is left blank then the Alert will display for all cases that meet the "Alert When" settings until the alert gets expired. If a Case number is entered in the Case # field then the Alert will display only when the selected case is modified. If a particular case is selected, the alert will only appear when that case is opened for editing. Please note that the "On Case Entry/Edit" alert is only triggered for "In Production" cases. ➢ On Invoicing - This alert will display any time a case is invoiced. If a particular case is selected, the alert will only appear when that case is invoiced. ➢ On Shipment (Shipping Manager) - This alert will display when you process a shipment for the customer. If a particular case is selected, the alert will only appear when you process the shipment containing that case. ➢ On Calls (Add & Edit) - This will display an alert when users add or edit a call for that customer record. ➢ On Accounting Page - Alert will display when the 5. Accounting tab is accessed. ➢ On Customer Access - Alert will display when the customer form is opened. ➢ For Custom Messages (i.e Work Order Alert) - The message will display on the Work Order form. Please confirm with MTSI if your Work Order form does include this alert message. This may require custom development. Please Note: You may check more than one alert option. 3.Select a particular case for the alert by clicking on the Please Note: Entering a Case number is not mandatory, however if the field is left blank then the Alert will display for all cases that meet the Alert When settings until the alert gets expired. If a Case number is entered in the Case # field then the Alert will display only when the selected case is modified. 4.Allow users to Expire this Alert - If left unchecked, users cannot manually expire this alert. The alert will automatically expire on 'Expires on' date, or will not expire if no date is entered. 5.Set the alert expiration date by selecting a date in the 'Expires on' field. You can manually expire an existing alert by checking the This Alert is Expired option. 6.Enter the alert text in the Message box. Please Note: In the Message box, Alert Common Notes may be used to select from the most frequently used comments. The list of common notes is defined under File > Global Settings > Global > Miscellaneous > Common Notes. 7.Click |
If there are any active alerts for the operation performed, these alerts will display on the Customer and Case Alerts form.
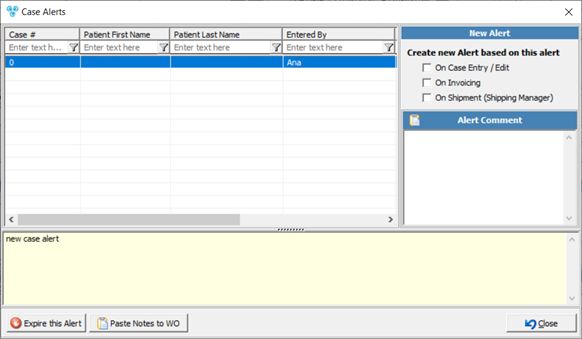
The Case Alerts form will display all alerts that are set for the operation that is performed. Each alert will display information about which user entered the alert, the date the alert was created, the expiration date and the alert message.
This form has following options:
➢ Customer Alerts - When adding a new case and the alerts pop up, users have the option to create a new alert based on the current alert. When the case is saved, a new alert is created and linked to the case.
Customer and Case Alerts form when case is added
➢ ➢ Please Note: The expired alert will no longer be active. It will still be displayed in the Customer & Case Alerts form, but as an expired alert.
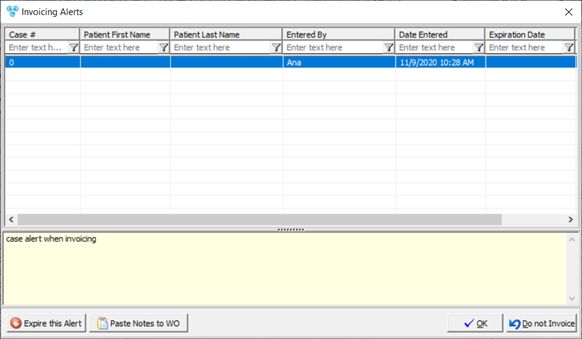
Customer and Case Alerts form when invoicing
➢ Please note: If the Alert is set for when a case is invoiced, then an additional option is available: ➢ |
1.On the Customer & Case Alerts form, select the Alert you wish to update. 2.Click on the 3.Modify any necessary fields. 4.After making changes click |
1.On the Customer & Case Alerts form select the Alert that you wish to delete. 2.Click on the 3.Select Yes when prompted for confirmation. The selected record will be deleted and will no longer display in grid. |
See also: