Case Status |

|

|
|
Case Status |
|
|
Case Status |
|
|
|
Case Status |
|
|
Usage:
When a new Case is created, a default status is assigned to it. The case status changes automatically depending on which operation is performed. For example a new case has an In Production status while an invoiced case has an Invoiced status.
Navigation: Customer > 4. Cases
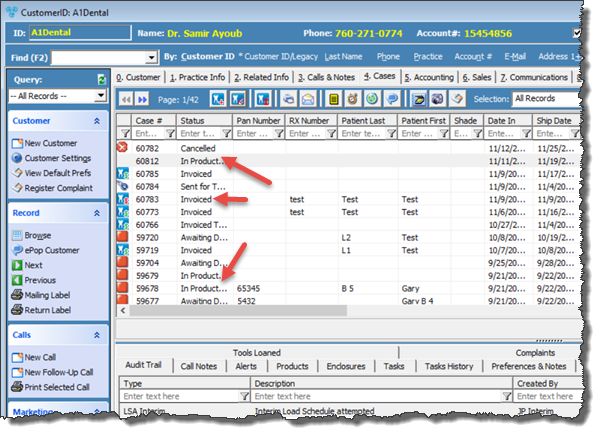
Cases form with cases with different statuses
Note: Statuses are defined in File > Settings > Global > Laboratory Lists > Status and can be changed.
The following section shows the most common statuses and what each one represents.
Case Statuses:
➢ In Production - Typically represents the new case status. This is the default status that is set in the File > Settings > Global > Case Options > Case Entry tab.
➢ Invoiced - Typically used for Invoiced cases. This is a default status that can be changed in the File > Settings > Global > Case Options > Case Invoicing tab.
➢ When Invoicing for TryIn it is recommended to define two or three different statuses as there are several possible paths to take. These statuses are set on the File > Settings > Global > Case Options > Try In Invoicing tab. Using the default statuses as an example, if you choose to create a new case after Invoicing for TryIn then the old case will have the default status Invoiced TryIn. If you select to only change the status without invoicing, then the case will receive the Sent for TryIn status by default.
➢ On Hold - This status represents On Hold cases. As an example, a case may be placed on hold if additional information is needed from the doctor before production can continue. The On Hold option is available on the Edit Case form > 1. General tab. To place a case On hold, simply select the option and enter a Reason. The Status will update automatically.
➢ Cancelled - This status represents canceled cases. The Cancel option is available on Edit Case form > 1. General tab. To Cancel a case simply select the option and enter a Reason. Alternatively, you can right click on the case and select Case > Cancel. The status will change automatically.
➢ Submitted - Cases submitted through the Customer Portal or Digital Gateway will be created with this status. Cases stay in Submitted status until they are Accepted by the lab. To Accept a Web Case, right click on the submitted case and click on the Accept Submitted Case option.
See also: