Email Templates Manager |

|

|
|
Email Templates Manager |

|

|
Usage:
Users may compose an email or select from existing template. It is highly recommended that someone in the Lab creates the required templates in advance, spell check and proof it so it is ready for everyone to use.
Navigation
To create email templates navigate to • Marketing page from the sidebar and click E-mail Templates icon
E-mail Template navigation |
• or View > Email Templates E-mail Template navigation |
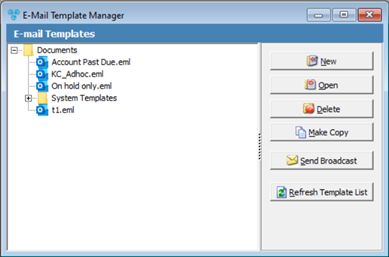
When opened this is what the Email Template Manager form will look like.

Email Template Manager form
Warning:
The templates found under System Template will be replaced or updated during future upgrade. When using these templates, please create your own with a different name.
***See topic System Templates on how to configure system templates for use.
The templates may be organized by creating folders on the left panel. 1.Right click on the root folder called Documents 2.Select New Folder. Please Note: ➢ You may also Delete or Rename an existing template or folder. ➢ You may create sub-folder within a selected folder as well. |
There are 3 ways to make your own template. ➢Rename Option: 1.Simply right click on the template that you would like to customize and rename it to something else. For example, if the template is called Daily Alerts, you can rename it to My Daily Alert. ➢Copy the template: 1.Create a new folder or point to an existing folder. 2.Click
New Template form 3.Navigate to the System Template and open the desired template. 4.Press Ctrl+A to select all, Ctrl+C to copy 5.Close the system template. 6.Switch to your empty template and press Ctrl+V to paste it. 7.Click the Save button. 8.Select the Folder, give your template a name. 9.Follow the instruction to assign this newly created template to your Lab. ➢Add a new one 1.Click on the desired folder where the template will get created. 2.Click the
New Template form 3.All you need to enter is a Subject and the desired text in the email body, you may Save the template and use it at any time.
You may also use any of the following options that are available when creating templates: ➢Add Merge Field - Please note: Your email will not look professional if the merged field is blank ➢Merge Preview - ➢Attach - ➢Send Test - ➢Print - ➢Available Tools - ➢Save -
You may edit the templates at a later time by selecting the template and click |
1.Please refer to this topic for more details. |
See also:
How to send Single email from Template