Automated Job Management |

|

|
|
Automated Job Management |
|
|
Automated Job Management |
|
|
|
Automated Job Management |
|
|
Usage:
The Automated Job management tool is designed to allow users to automate the most common reports to be generated regularly. This option will produce any specified reports automatically and deliver them without any user interaction.
Navigation: Automated Services from the Side Bar menu, then click Job Management
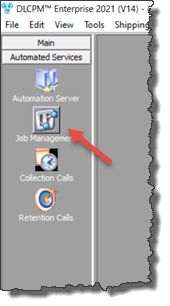
Job Management
The following form will open:
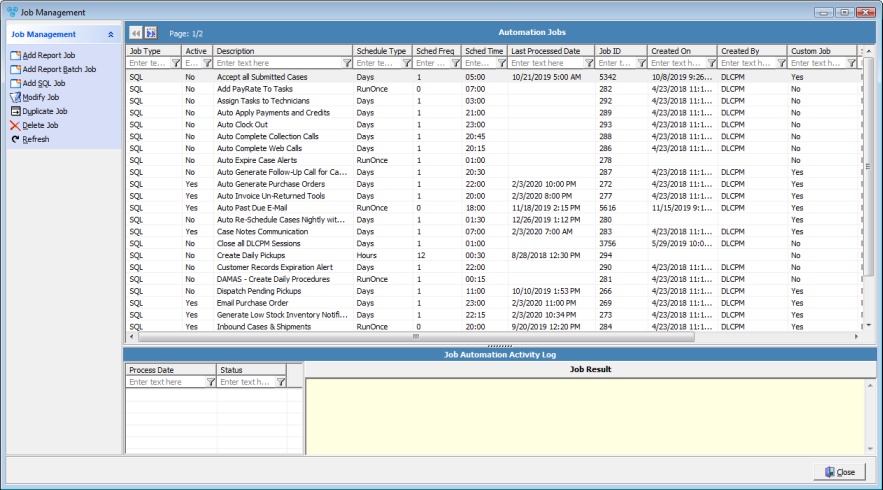
Job Management form
1.On the Job Management form click Add Report Job and the following form will open.
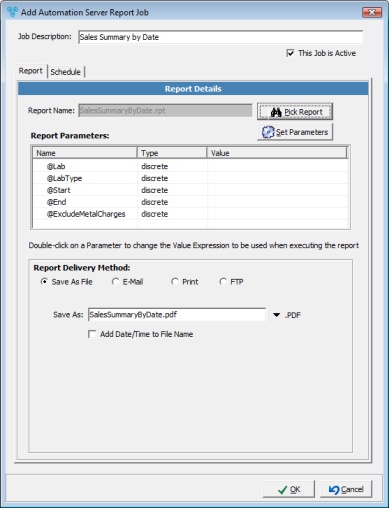
Add Automation Server Report job form 2.Enter Job Description - This is where you will name the report. You may want to choose a descriptive name so it will be easier to recognize the report job. 3.Check This Job is Active if this is the case. 4.On the Report tab, the following fields are available: ➢ Report Name - Click on Pick Report to select from one of the available reports. ➢ Set Parameters - Depending on the report, several parameters are available to set. Click on the Set Parameters button and enter the desired values. ➢ Report Parameters - Once the report is selected, the required parameters will display. Double click on the Value field for each parameter in order to set the value.
Please Note: If the parameter is static like Lab Name, simply enter it, i.e. Lab or All. If the parameter is a date, click on the Variable drop down to set the relative date. The "NOW" data range parameter is not supported for Report monitor.
Please Note: You may add or subtract from the variables to specify if the report should run for the previous, day, month, etc. For example: • - 1 = minus one day •- W1 = minus one week •- M1 = minus one month •- Y1 = minus one year •+ W2 = plus two weeks •- 10 = minus ten days Examples of this using the date variables: •YEAR_START - Y1 = first day of the previous year •MONTH_END - 1 = second to last day of the current month
➢Report Delivery Method - There are 4 different delivery methods: •Save as File - Save the report into a repository as a separate file. The supported file formats are PDF, Excel, MS Document and CSV. •E-mail - This option will email the report. Provide the Email address and the file format. •Print - This option will print the report. Select one of the available network printers. •FTP - This option will transfer the report to an FTP Server in the specified format. 5.On the Schedule tab, specify how often this report should run.
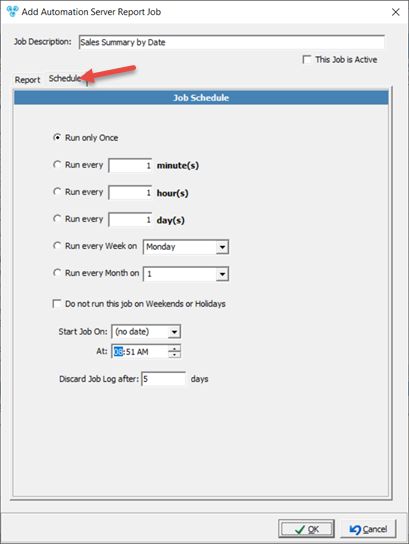
Schedule tab The options are: ➢ Run only Once. ➢ Run every X Minutes, Hours, Days. ➢ Run every Week on selected day. ➢ Run every Month on selected day. ➢ Enter the start time in Start Job On field. Optionally, define the date that you want the job to start on as well.
6.Set the number of Days in Discard Job Log after field to define how long job logs should be stored. 7.Click OK to save the report. After the report has been saved, you may right click on the job to run it now. |
1.On the Job Management form click on Add Report Batch Job and the following form will open.
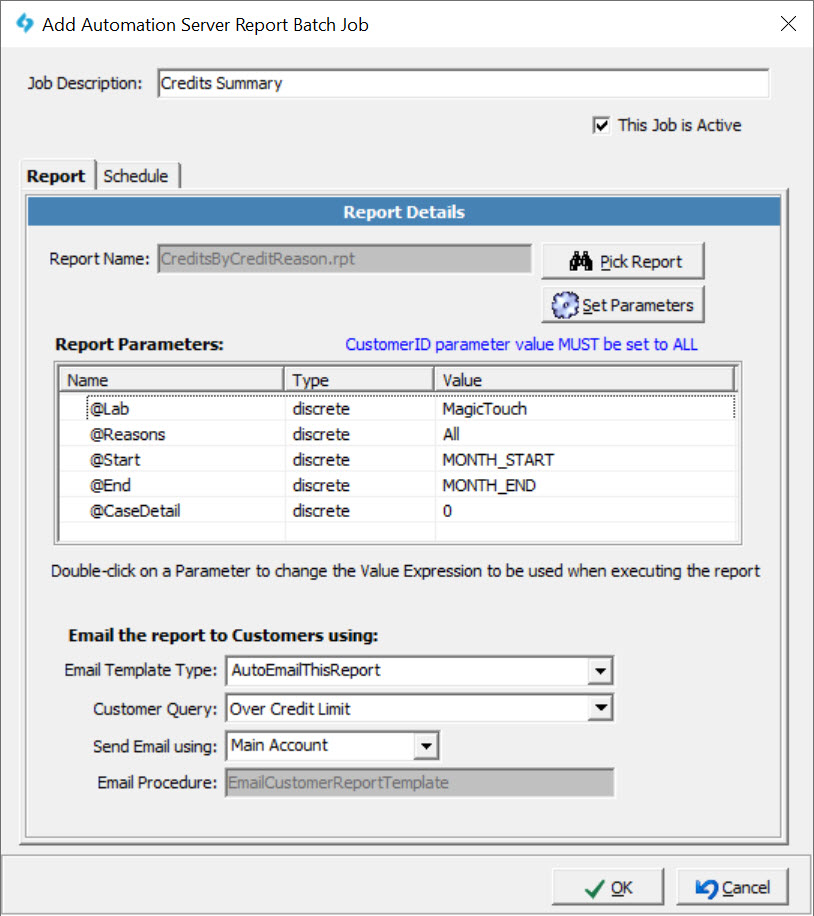
Add Automation Server Report Batch Job form 2.Enter Job Description - This is where you will name the report. You may want to choose a descriptive name so it will be easier to recognize the report. 3.On the Report tab the following fields are available or populated: ➢ Report Name - Click on Pick Report to select from one of the available reports. ➢ Set Parameters - Depending on the report several parameters are available to be set for a more accurate report. Click on Set Parameters and enter the values. ➢ Report Parameters - Once the report is selected, the required parameters will display. Double click on the Value field for each parameter in order to set the value. Please Note: If the parameter is static like Lab Name, simply enter it, i.e. Lab or All. If the parameter is a date, click on the Variable drop down to set the relative date.
Please Note: You may add or subtract from the variables to specify if the report should run for the previous, day, month, etc. For example: • - 1 = minus one day •- W1 = minus one week •- M1 = minus one month •- Y1 = minus one year •+ W2 = plus two weeks •- 10 = minus ten days Examples of this using the date variables: •YEAR_START - Y1 = first day of the previous year •MONTH_END - 1 = second to last day of the current month
➢ E-mail the report to the Customer using: •Email Template - select template from the dropdown. •Customer Query - select query from the dropdown. •Send Email using - select either Main Account or Billing Contact email. •Email Procedure 4.On the Schedule tab, specify how often this report should run.
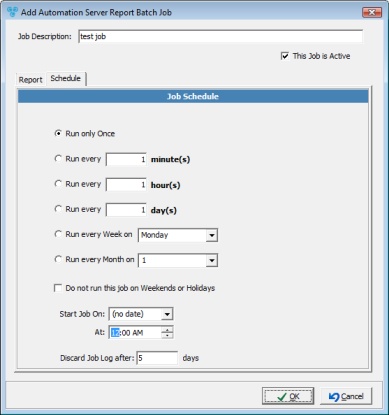
Schedule tab 5.The options are: ➢Run only Once. ➢Run every X Minutes, Hours, Days. ➢Run every Week on the selected day. ➢Run every Month on the selected day. ➢Enter the start time in Start Job On field. Optionally, define the date that you want the job to start on as well. 6.Set the number of Days in Discard Job Log after field to define how long job logs should be stored. 7.Click OK to save the report. After the report has been saved, you may right click on the job to run it now. |
How To Set Up an Advanced Export Job The Advanced Export Job lets you automatically run a saved Advanced Export on a schedule. The job can save the exported file, email it, or upload it by FTP, depending on how you configure the output. Before creating the job, make sure the Advanced Export template already exists. The job does not define the export fields itself; it uses an existing export template.
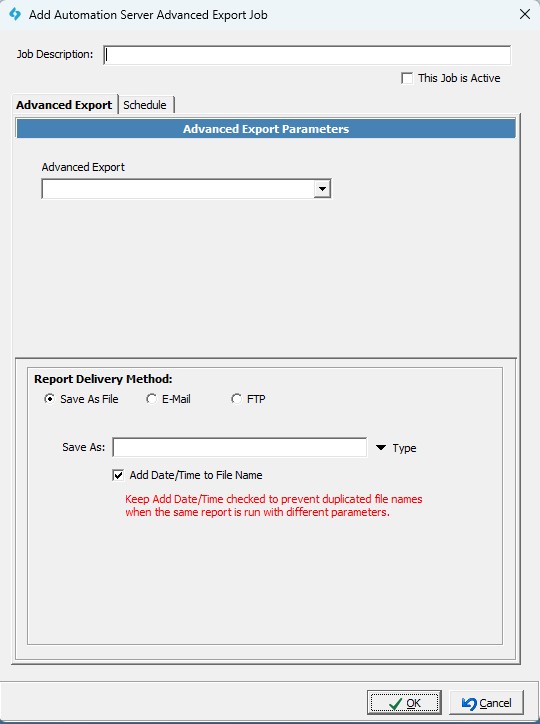
Step 1: Navigate to the Job Management Configuration menu. In the Job Management menu, click "Add Advanced Export Job". This opens the Job Management job setup window in Advanced Export mode.
Step 2: Enter the Job Details ➢In Job Description, enter a clear name for the job. ➢Check "This Job is Active" if the job should run automatically. ➢In the Advanced Export field, select the export template you want this job to run. ➢The selected export template controls what data is exported, which fields are included, and whether the export is based on a query or campaign.
Step 3: Choose the Report Delivery Method Choose how the exported file should be delivered.
For "Save As File": ➢Enter the output file name or full file path. ➢Choose a type. Both .XLS and .CSV are available to export. ➢Leave Add Date/Time checked if you want each run to create a uniquely named file.
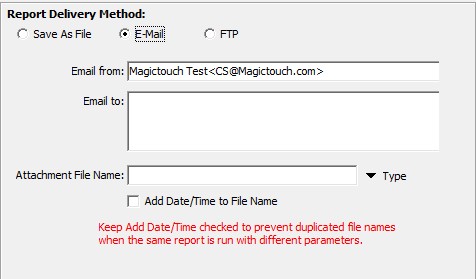
For Email: ➢Select Email. ➢Enter the recipient email address. ➢Enter the attachment file name. ➢Optionally enter the sender email information if required. ➢Leave Add Date/Time checked if each emailed attachment should have a unique file name.
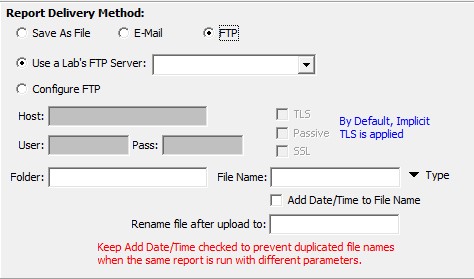
For FTP: ➢Select FTP. ➢Choose whether to use a lab FTP server or configure FTP manually. ➢Enter the FTP host, user, password, folder, and file name. ➢Select SSL, TLS, or Passive mode if required by the FTP server. ➢Leave Add Date/Time checked if each upload should use a unique file name. The Advanced Export jobs do not support printing.
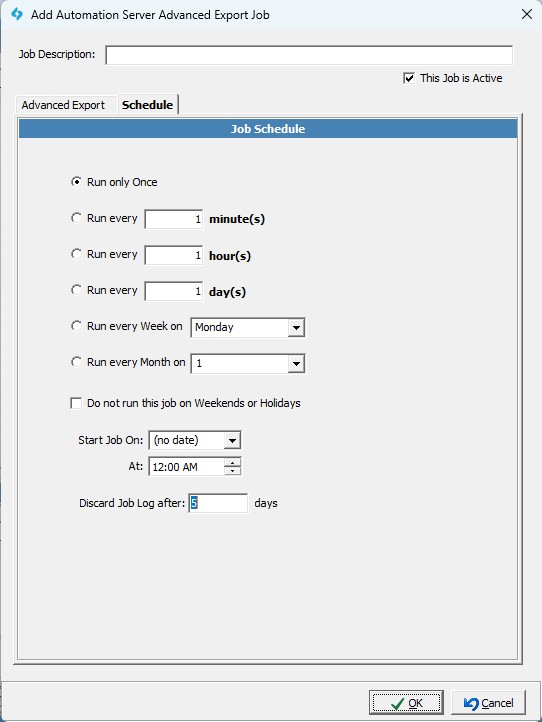
Step 4: Set the Schedule Open the Schedule tab and choose one of the schedule options:
➢Run only Once to run the job one time. ➢Run every X minutes for frequent recurring exports. ➢Run every X hours for hourly exports. ➢Run every X days for daily interval exports. ➢Run every Week on to run the job weekly on a selected day. ➢Run every Month on to run the job monthly on a selected day. Then: ➢Set the Start Job On date. ➢Set the time in the At field. ➢Set Discard Job Log after to control how long job history is kept. Check "Do not run this job on Weekends or Holidays" if the job should skip those days.
Step 5: Save the Job ➢Review the job description, selected export, output action, and schedule. ➢Click OK. The job is saved and will run according to the schedule if it is active. How It Will Work When the scheduled time is reached, Job Management runs the selected Advanced Export template. The system uses the export template settings to determine which records and fields to export. It then creates the export file and sends it to the configured destination. If Add Date/Time is enabled, the system appends a time-stamp to the file name so each run creates a separate file. This helps prevent one export from overwriting a previous export. If the job is configured to save a file, the export should appear in the selected folder. If the job is configured for email, the recipient should receive the exported file as an attachment. If the job is configured for FTP, the exported file should appear in the configured FTP folder. You can also use Run Now from Job Management Configuration to manually trigger the job for testing. After it runs, review the job log to confirm whether it completed successfully or if any errors were reported.
|
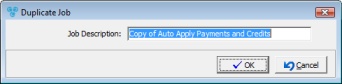
1.On the Job Management form select the job you want to duplicate 2.Click on Duplicate Job and the following form will open:
Duplicate job form 3.Enter Job Description - By default the Job description is populated with "Copy of... " selected job. You may change this description and choose a suggestive name so it will be easier to recognize the reports. 4.Click OK. 5.Job is saved in Job Management form. You may edit it if necessary. |
See also: