Daily Alerts |

|

|
|
Daily Alerts |
|
|
Daily Alerts |
|
|
|
Daily Alerts |
|
|
Usage:
In addition to the existing Email and Text Messaging alerts, each customer may be setup to receive the following daily alerts:
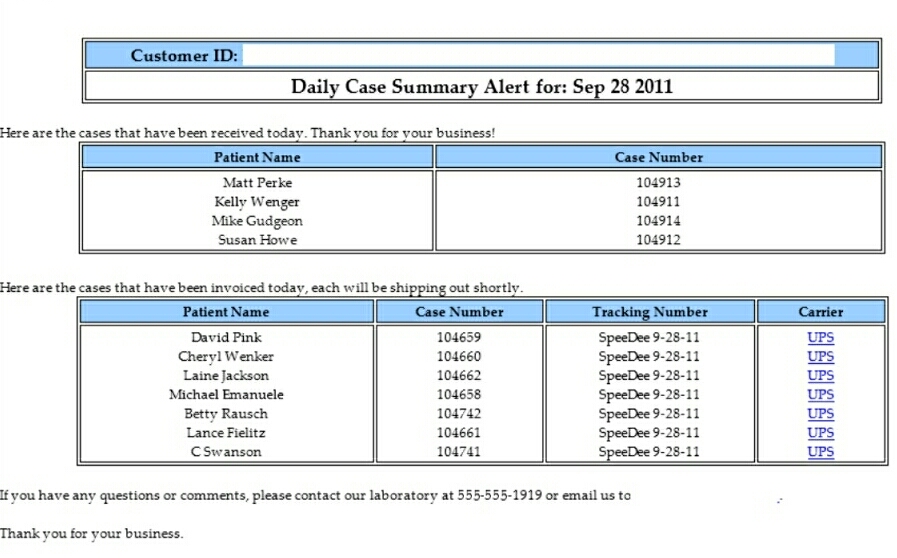
•Daily Inbound Cases & Shipments include all the cases received and shipped each day. It includes the carrier and tracking number for each case, as well as a link to the Case Evaluation if one exists.
•There are a variety of different email templates that can be used for the Daily Inbound Cases & Shipments. All the system email templates can be found in the Email Templates menu.
•Ex. In order to add the Case Evaluation links, you can choose to use the "Inbound Cases and Shipments - Case Ratings" email template. This adds a direct link to the Customer Portal case evaluation page, where the lab's customers can review and submit an evaluation for a case based on what is set up in your production environment. Please note that cases will need to be invoices and shipped to appear on the list for that day and a subscription to the Customer Portal will be required.
•Daily Invoices includes a PDF file listing all invoices for the day. This alert is associated to the Nightly Invoices email template and automation job.
•Both of these Daily Alerts require email templates to be set in Global Settings > Laboratory List > Laboratories > Edit Lab > Lab Templates
Both alerts are optional per customer and they are automatically emailed at a designated time at the end of each day.
Daily Inbound Cases & Shipments
How do I activate the Daily Alerts?
There are several steps that must be taken to activate these alerts.
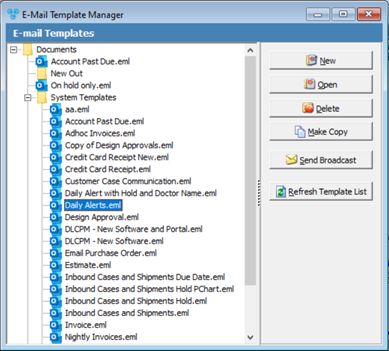
➢ Navigate to Marketing page from the left panel. ➢ Click on Email Templates. ➢ Expand the System Templates > Alerts folder. ➢ Open Daily Alerts.eml.
Email Templates ➢ Make any necessary edits. Warning: This template contains several merge fields and altering the template may result in malformed email. You may change the logo, fonts, color, and text label but do NOT change the tables or any of the merge fields. The e-mail templates found under System Templates will be replaced or updated during future upgrades. When using these templates, please create your own with a different name to avoid your changes being overwritten.
There are 2 ways to make your own template. 1. Rename Option: ➢ Simply right click on the template that you would like to customize and rename it to something else. For example, if the template is called Daily Alerts, you can rename it to My Daily Alert. 2. Copy the template: ➢ Select the template you want to make a copy of, then right-click on it and select Make Copy. ➢ In the window that opens, enter a name for the template in the File Name field. ➢ Click on the folder that you want to save the new template in, or right-click in the window and select New Folder to create a new one. ➢ Once you've highlighted the destination folder for the new template, click the Select button to save the template. ➢ Follow the instructions to assign this newly created template to your Lab. |
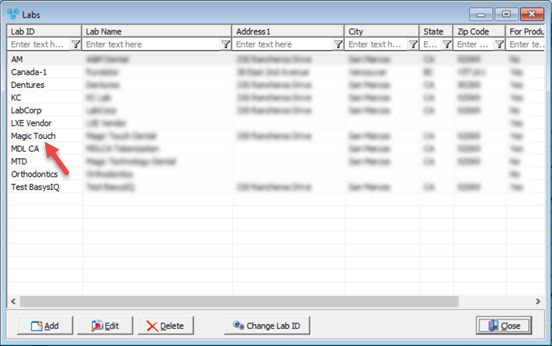
➢ Navigate to File > Global Settings > Laboratory List > Laboratories.
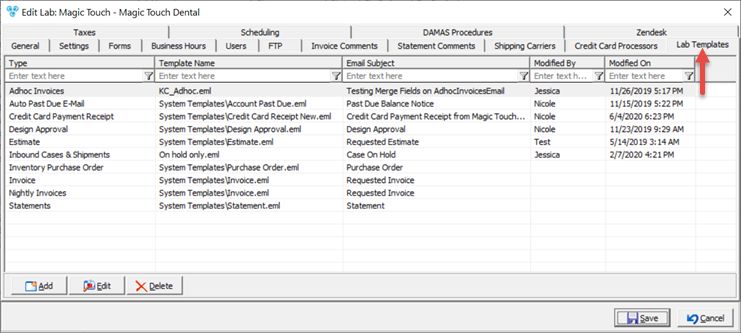
Laboratories ➢ Edit the Lab which you plan to activate the Daily Alerts for. ➢ Click on the Lab Templates tab.
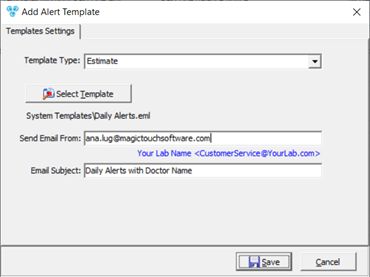
Laboratories > Lab Templates ➢ If the list is blank, click Add. ➢ Select the template found in Step 1.
Add Template Please note: The Email Subject set in the Lab Settings > Lab Template menu will override the Email Subject from the Marketing > Email Templates menu. ➢ Click |
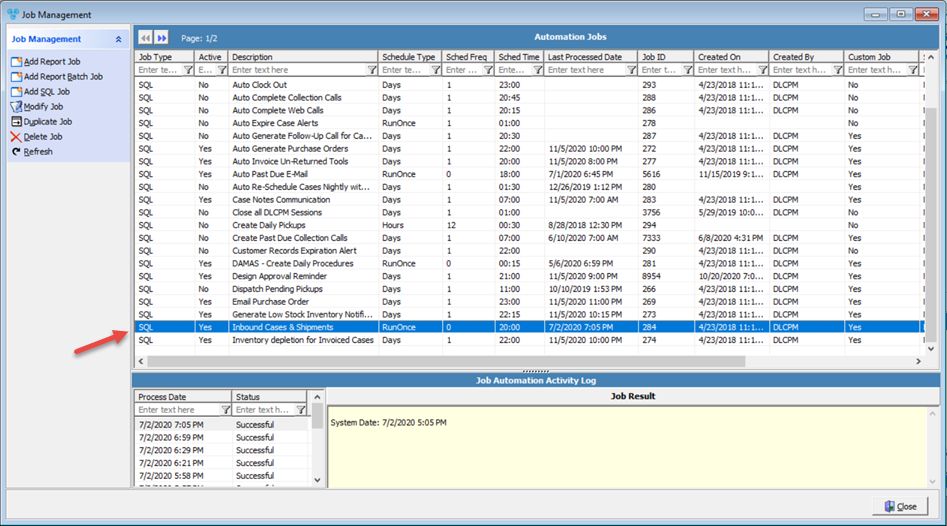
➢ Click on Automated Services on the left panel. ➢ Click Job Management. ➢ Find the Job named “Inbound Cases & Shipments".
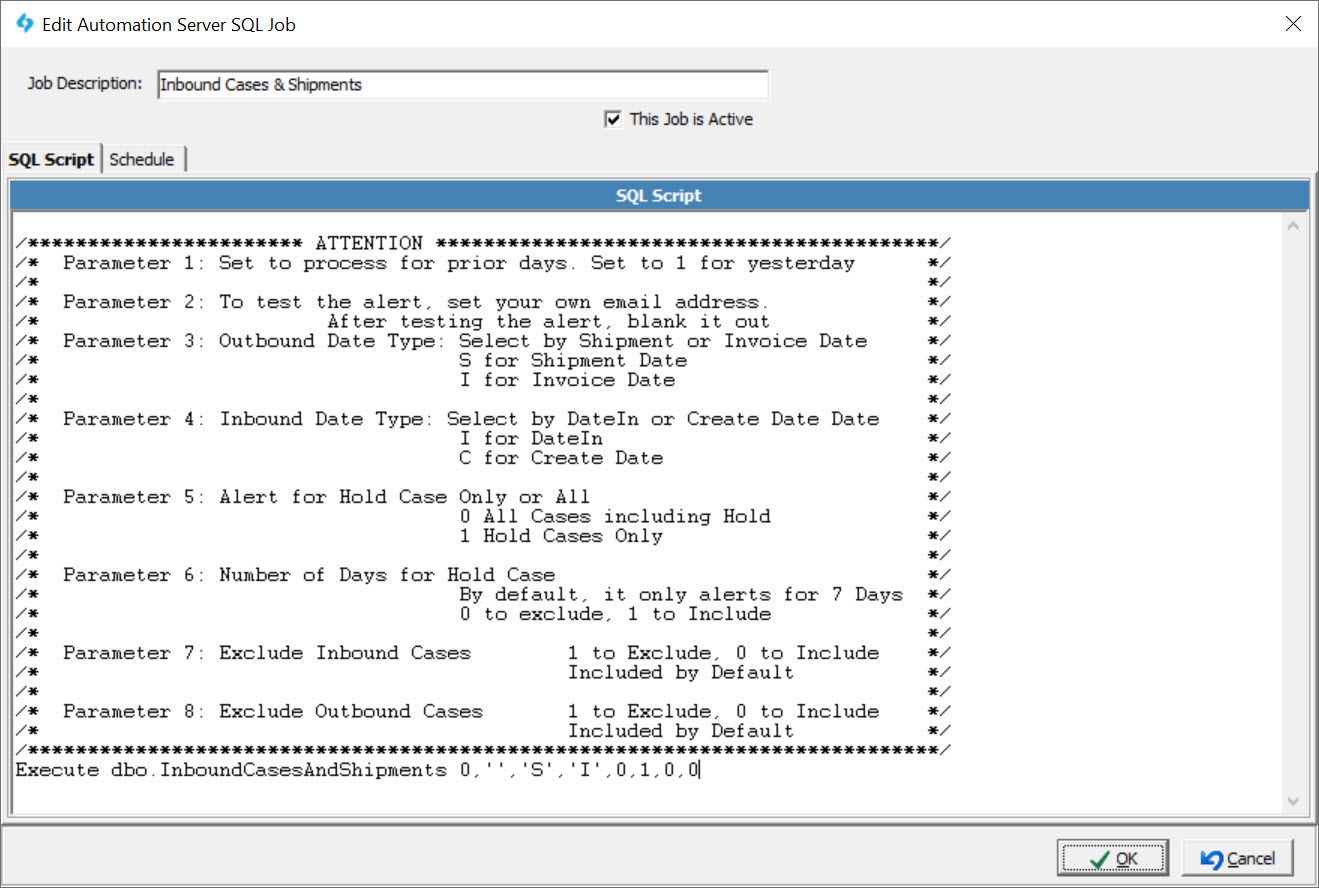
Job Management ➢ Double click on the job to open it. ➢ Check the “This Job is Active” box. ➢ Edit the parameters in the SQL Script tab as desired. ➢ The time and frequency of the job can be changed from the Schedule tab.
Edit Automation Server Job Please Note: If a test email was set in the parameter menu, please make sure to clear out that parameter before going live or all the emails queued will be sent to the test email address. ➢ Click OK to Save. The Daily Alerts are now enabled, and you may activate them for the customers that you would like to receive them. |
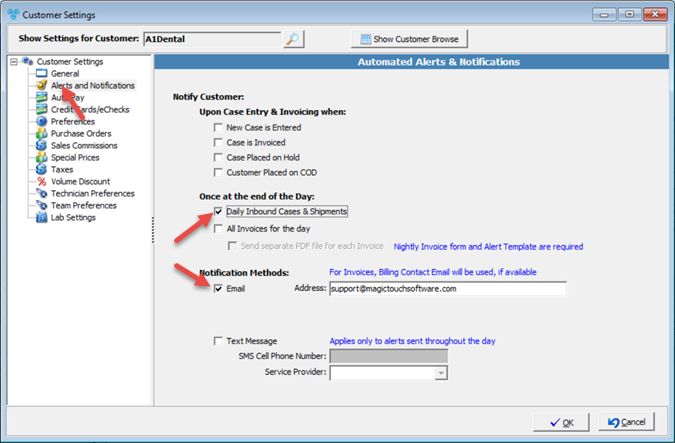
➢ While on a Customer record, click Customer Settings > Alerts & Notifications. ➢ Locate the “Once at the end of the Day” section. ➢ Select from the 2 available options. ➢ Enable the Email notification method and ensure that a valid email address is entered.
Customer Settings ➢ Click OK to save your changes.
|
Quick Tip: Before setting up any automation jobs, be sure to activate a test account, wait for the end of day or right click on the Job, click "Run Now" to receive the email and to make sure the email looks correct before activating the feature for all of your customers.