|
Submit RX |

|

|
|
|
Submit RX |
|
|
Submit RX
|
Submit RX |
|
|
|
|
Submit RX |
|
|
•What is Smart RX?
Smart Rx is one of the latest features of Customer Portal allowing laboratories to create their own digital prescription and make it available to their customers. When submitting a new Case, Doctors would be able to select Submit Rx option and fill out the form electronically before sending a case. The case does not have to be a digital case and doctors can still print the Web WO and send it along with the case.
Note: Smart Rx requires subscription to Customer Portal
•Smart RX Components:
This feature utilizes the existing Preferences system in DLCPM along with the following options:
➢RX Categories
➢RX Type
➢RX Type Preferences
•Steps to configure Smart RX:
Step 1:
Navigate to File > Settings > Global > Products & Tasks Lists > RX Categories. This is very similar to Department, Types, or Group except that it is used for Smart Rx exclusively.
RX Categories
Some sample Categories have been added for you.
a.Add all the Categories as needed. For more info about how to add new category please read this topic.
b.Go to each product and assign the respective category. For more info about how to assign a category to a product please read this topic.
Example: You may want to add a Category called PFM, then assign it to PFM Noble, PFM HN Yellow, PFM HN White or so on. When Doctor is filling out the Rx and selects PFM, only products assigned to PFM will be displayed.
Step 2:
Navigate to File > Settings > Global > Laboratory Lists > Preferences. Preferences offer additional options to be used by the Smart Rx features. You may add a new Preference or modify the existing ones.
Please note the following options:
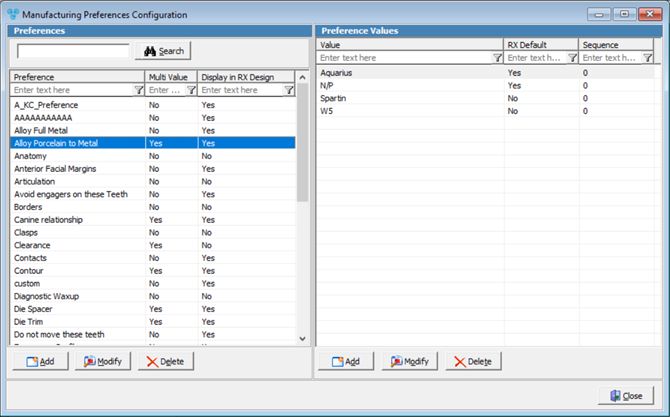
Case Preference
•Select Preference Type - this drop down list contains 4 options:
a.Standard - most preferences are Standard preferences meaning the Prescription will display the preference as-is along with the possible values. For example, Contacts, Die Spacer, or Die Trim
b.Custom Entry - this option displays a preference where there are no values and you are expecting the doctor to type it in. For example if the Preference is Shade, you would then add a custom entry so doctor can enter the shade.
c. Display Tooth Chart - if the preference requires selecting tooth number, this option will automatically display a link allowing doctor to select the tooth from the chart.
d. Fixed Text - will display any text on the Rx as needed. For example, you may add a Preference called Rush and place text underneath it to indicate that there will be a 20% additional charge for rush cases.
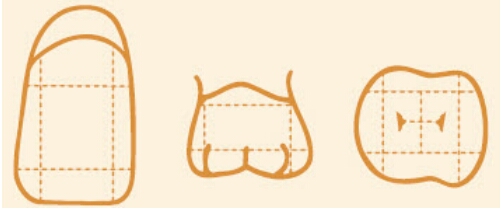
•Enter Image - this option would allow any image that you would like to be displayed on the Rx as a link. For example, the image of Pontic Design, Shade Stump, Margin Design, or Contacts.
Here is an example:
•Enter Description - if entered, it will be displayed next to each preference
Step 3:
By completing step 1 and 2, you are now ready to design the Rx.
Navigate File > Settings > Global > Products & Tasks Lists > RX Design. Here you will be selecting the preferences that will need to be included on each RX depending on the Type. Please note the screen below.
RX Design Maintenance form
RX Type:
This type of prescription is much like having paper Rx. For example Fixed, Removable, Partial, Guards, Ortho, and so on. The preferences are linked to Rx Type where products are linked to Rx Categories.
Simply click ![]() in the RX Type section and add the desired Rx Type. We have included some samples for you.
in the RX Type section and add the desired Rx Type. We have included some samples for you.
RX Categories:
On the section below RX Type, you will find the RX Categories. You will need to decide which category of products should be associated to wich Rx Type. For example, if the Rx Type is Crown & Bridge, you may have categories like Full Cast, and PFM selected since they have the same requirements. Keep in mind that there are no limits on how many Rx Types you can create but having too many of them might make it difficult for your customers.
RX Preferences:
On the right side of the screen you will find the preference section. Preferences are basically the items that make up the digital prescription. Make sure to select a Rx Type and then add as many preferences as you like. Once the preferences are added, you may use the up/down buttons to set the order of them.
We strongly recommend that you first add one Rx Type with a couple of preferences and view it in Customer Portal before designing all of your prescriptions.
Customer Portal Management Console has a new option to Enable / Disable the Smart Rx so be sure to turn it on while testing and turn it off until you are ready to utilize this feature. You do not want your customer to have access to this option while under development.
Our consulting services are also available to design the Rx for you based on your printed Rx.