Case Preferences Maintenance |

|

|
|
Case Preferences Maintenance |
|
|
Case Preferences Maintenance |
|
|
|
Case Preferences Maintenance |
|
|
Usage:
Case Preferences and their values need to be entered in order to be able to set different preferences for the customers later on. Each customer may have its own list of preferences related to products or departments which will be entered on the customer settings form. In order to be able to set up these lists the first thing to do is to enter the possible preferences on this form.
Navigation: File > Global Settings > Global > Laboratory Lists > Preferences
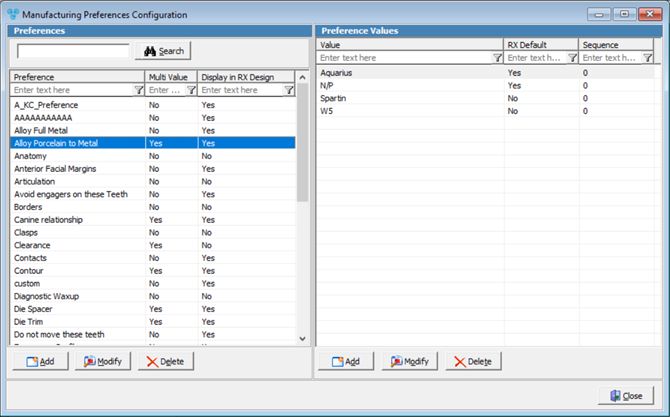
Case Preferences Configuration form
1.Click 2.Enter the new Preference name. 3.Check Multi Value field if later you want to allow more than one value to be selected for the specified Preference. You can enter as many values as you want for a preference, but you will not be able to select more than one value when the preference is added to the customer unless this option is checked. 4.The following settings are used for Smart RX form in conjunction with customer portal. •Select Preference Type - this drop down list contains 4 options: a.Standard - most preferences are Standard preferences meaning the Prescription will display the preference as-is along with the possible values. For example, Contacts, Die Spacer, or Die Trim b.Custom Entry - this option displays a preference where there are no values and you are expecting the doctor to type it in. For example if the Preference is Shade, you would then add a custom entry so doctor can enter the shade. c. Display Tooth Chart - if the preference requires selecting tooth number, this option will automatically display a link allowing doctor to select the tooth from the chart. d. Fixed Text - will display any text on the Rx as needed. For example, you may add a Preference called Rush and place text underneath it to indicate that there will be a 20% additional charge for rush cases. •Enter Image - this option would allow any image that you would like to be displayed on the Rx as a link. For example, the image of Pontic Design, Shade Stump, Margin Design, or Contacts. •Enter Description - if entered, it will be displayed next to each preference 5.Click |
1.Select the Preference record you want to update by clicking on it. 2.Click 3.Enter the new name in the Preference field or change the Multi Value option. 4.The following settings are used for Smart RX form in conjunction with customer portal. you can modify: •Preference Type. •Image. •Description. 5.Click |
1.Select the Preference you want to delete by clicking on it. 2.Click 3.Select YES when prompted for confirmation. Note: Record will be deleted from the database, but you can add it back at any time. |
1.Select the Preference for which you want to add values by clicking on it. If the selected preference already has values entered these will be displayed on the right list of the form. Otherwise this list will be empty. 2.Click on 3.Enter the new Preference Value. 4.Click OK button to save the changes. |
1.Select the Preference record you want to update. 2.Select the Value you want to update by clicking on the record in grid. 3.Click 4.Enter new name in Preference Value field . 5.Click OK button on Edit Preference Value form. Form will close and changes will be saved. |
1.Select the Preference and then select the Value you want to delete by clicking on it in the grid. 2.Click 3.Select YES when prompted for confirmation. Note: Record will be deleted from the database, but you can add it back at any time. |
See also: