Start |

|

|
|
Start |
|
|
Start |
|
|
|
Start |
|
|
Usage:
The start module allows the Driver to manage their Deliveries and Pickups, Select their Route, Select their Customer and Process Items.
Navigation: Once logged into the application click on Start Module
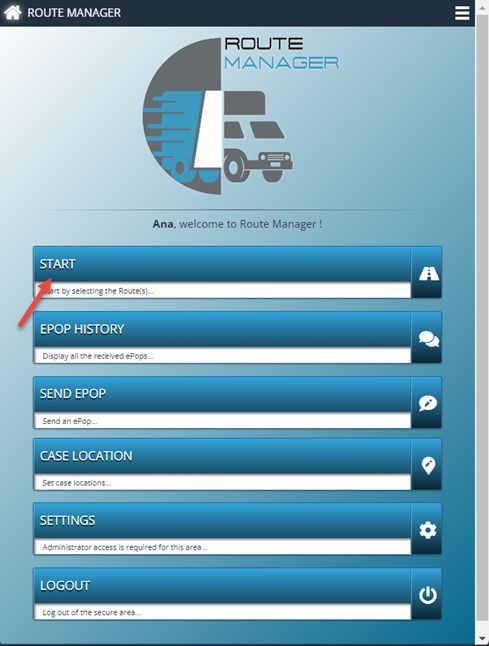
Start navigation
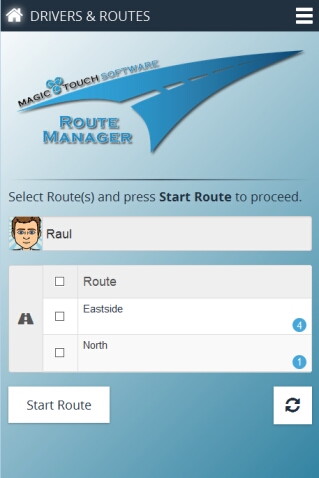
1.Click Start to pick up route.
Please note: Depending on the settings option for showing routes, the driver will see all routes or just one.
•All Routes
•Number of deliveries are displayed next to each route |
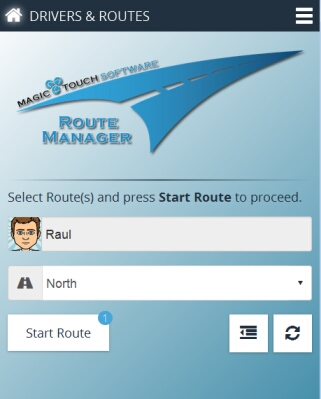
•One Route
•Number of deliveries is displayed on Start Route button •Click |
2. Select Route (one, multiple or all routes can be selected)
3.Click Start Route
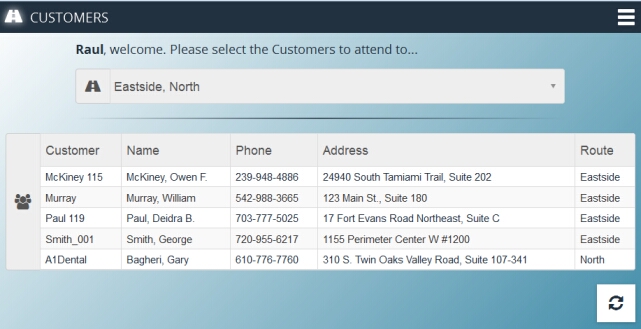
Customer list
4.Select the Customers to attend to.
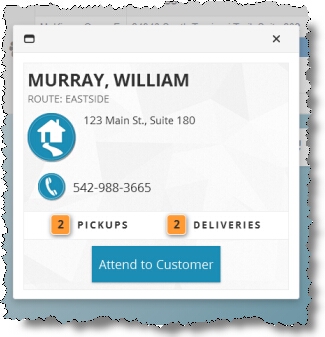
Selected Customer
5.Customer may have Pickups, Deliveries or both.
6. Attend to Customer
Attend to Customer
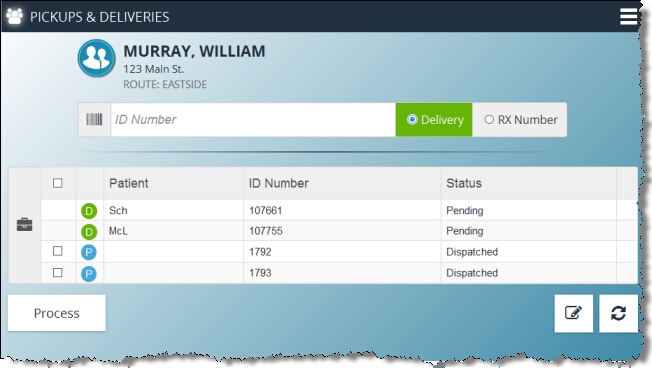
7. List of Pickups and Deliveries is displayed
Please Note: If Deliveries must be confirmed by Scanning or manually entering the Case # is set to Yes in Settings module, then checkboxes in front of deliveries are not available. In this case Deliveries must be scanned or manually entered to be selected.
8. Process Delivery
➢If Delivery Details were included in the Pickup or Delivery record, they will be available in last column. Please make sure that you read the notes before delivery.
➢Check the check box in front of delivery, or if not available, scan or manually enter Delivery ID.
➢Make sure that all deliveries are selected. All Deliveries need to be scanned/selected in order to proceed.
➢If Require signature to complete Deliveries is set to Yes in Settings module, then recipient's signature is required in order to process Deliveries
•Click on ![]()
•Doctor signature is required
•Click OK
➢Click Process
➢Message: "All selected items successfully completed." is displayed. If there are items left to complete then a message indicating the number of items left is displayed.
9. Process Pickups
➢RX Number can be assigned to Pickups:
•Check RX Number to scan RX. If there are no deliveries left, the Delivery scanning option is not available anymore so RX Number is the only scanning option left.
•Scan or enter RX Number.
•RX Number will be assigned to first available Pickup. Pickup is automatically selected.
•If there are no more Pickups, additional RX numbers will be added to the list.
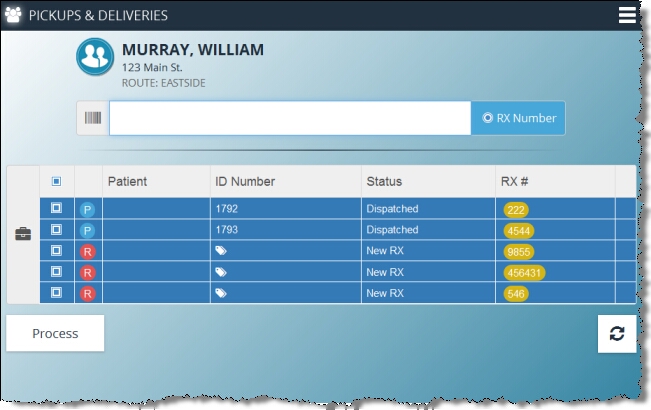
•To Remove RX Number, just uncheck the check box. If it is assigned to Pickup then RX number field will be cleared, otherwise record will be removed.
➢Select Pickups by checking the check box in front of Pickups. Unlike deliveries, all Pickups do not need to be selected in order to process.
➢Click Process.
➢Message: "All selected items successfully completed." is displayed. If there are items left to complete then a message indicating the number of items left is displayed.
10.When all items are processed, message: "All items successfully completed for customer ....." is displayed.
11.Customer is removed from the list. Next Customer can be selected.
12.When all items are completed on the selected Route (there are no more customers), then following message is displayed: "There are no more Customers with uncompleted Pickups or Deliveries on route North. Please change the Route and try again. "
See also: