Creating a Query |

|

|
|
Creating a Query |
|
|
Creating a Query |
|
|
|
Creating a Query |
|
|
Navigation: Click on Advanced Query Builder icon in Main menu or Tools > Advanced Query
Advanced Query Builder navigation
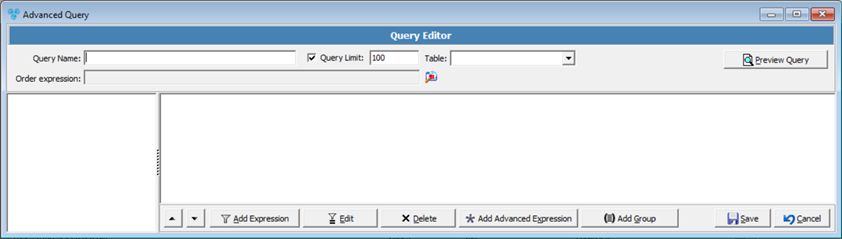
1.In Advanced Query window click on ![]() .
.
2.Advanced Query Editor form opens as shown:
Advanced Query Editor
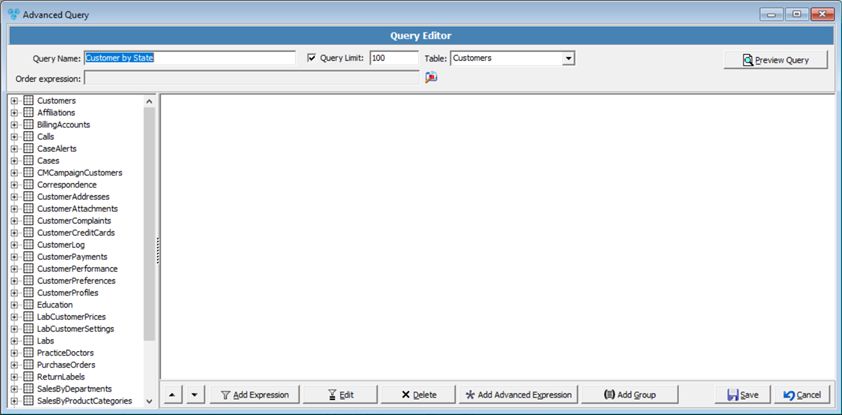
3.Define Query Name (ex: Customers by State)
4.Add Query Limit - this field is used to set a limit for a maximum number of records to View. It does not impact the result set when the query is used or exported. . If set to 100 then first 100 records that correspond to the query will be received. You may leave the box unchecked so no limit is set.
5.Select Table - this drop down is used to select a table in the database from which the query will be pulling data from. This is also referred to as the BASE table. For example, you are able to choose from: Customers, Calls, Cases, Products and many more. Each table has it's own set of columns. See here the list with all tables and columns.
Please note: Depending on the base table selected, you may see different set of tables shown in the screenshot below.
Some tables will have limitations on what values will be returned.
Cases - excludes Adjustments, memos, and Finance Charges.
CatalogProducts - excludes inactive products.
Tables
6. Add Expression - You may select to add an expression either by double clicking from the left-hand pane or by selecting the ![]() - Add Expression option from advanced query.
- Add Expression option from advanced query.
➢Click on ![]()
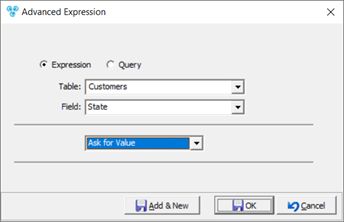
➢Add Expression form is displayed.
➢Table is set.
➢Select Field.
➢You will also need to select an option in the blank drop down menu. The available options you may select from the the drop down menu depends on the base table selected.
➢ When a value is selected, you can choose either a fixed value or ask for values. These will be the values that the query will look for and will either pull or not pull data depending on the drop down selected referenced above.
Add Expression
➢When all properties are configured, select ![]() to save.
to save.
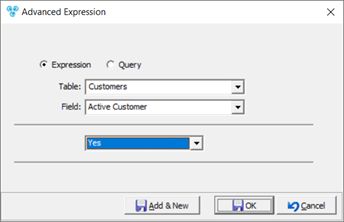
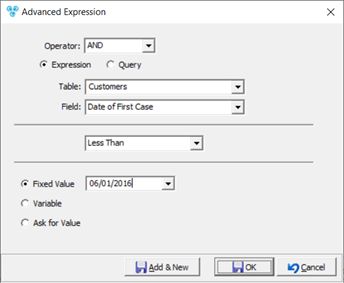
For example if you want to create a query for all active customers that entered first case before June 2016 you need to add two expression: •one for selecting all active customer:
•second for First cases date:
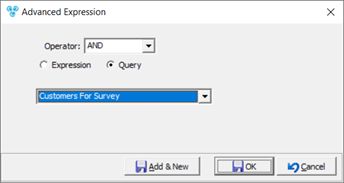
You may also select an existing Query to include it in the one that gets created. For example if you want to create a query for all active customers that entered first case before June 2016 and are for Survey, you can add the two expressions from above and then add another query that already is set for retrieving customers from the two states:
|
➢Expression is added:
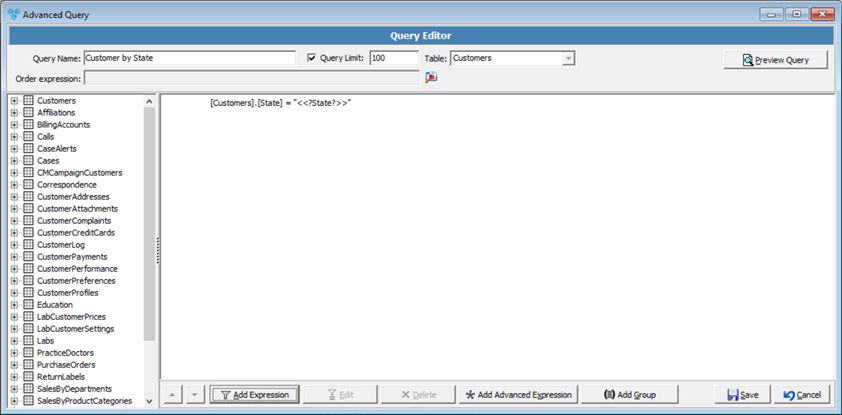
Advanced Query Editor - Expression is added
7.Add Advanced Expression - This option allows you to manually type in a set of values to narrow down the results to a specific data set.
Please note: This feature is not recommended if you are not familiar with the syntax used in writing advanced expressions. MTS Support Team does not provide training on how to use the appropriate syntax for the advanced expression option.
➢Click on ![]()
➢Manually enter the expression
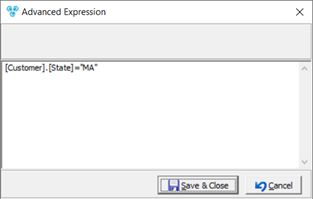
Add Advanced Expression
Please note:
•Only WHERE clause should be entered in the expression
•Must use double quote instead of single
•All aliases should be named
•All key words must be in uppercase
•All SQL functions must be preceded with @ i.e. @getdate(), @left(), @coalesce(), @Year(), @Convert()
•Most but not all SQL functions supported i.e. CharIndex()
➢Click Save and Close
8.Order Expression - This field may be used to sort a field in the query, in either ascending or descending order.
➢ Click on ![]() next to Order Expression field.
next to Order Expression field.
➢From here, you can select any order expressions. Select Table and Field that will be sorted on the left panel.
➢Click ![]()
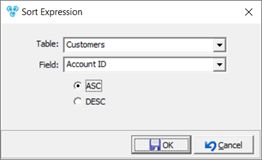
Sort Expression
➢On Sort Expression form you will be able to select the sort order: Ascending (ASC) or Descending (DESC). You may now modify the Table and Field if you change your mind.
➢Click ![]()
Please Note: You may Add more sorting expressions.
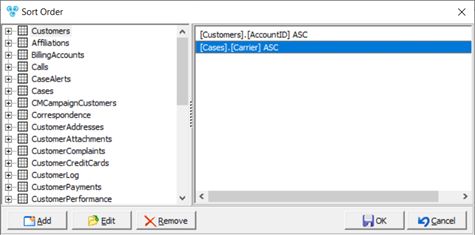
Sort Order - Expression added
➢To Delete an Expression just select it and click on ![]()
➢When done click ![]()
9. Once the sort expression has been added, the order expression will show in the field.
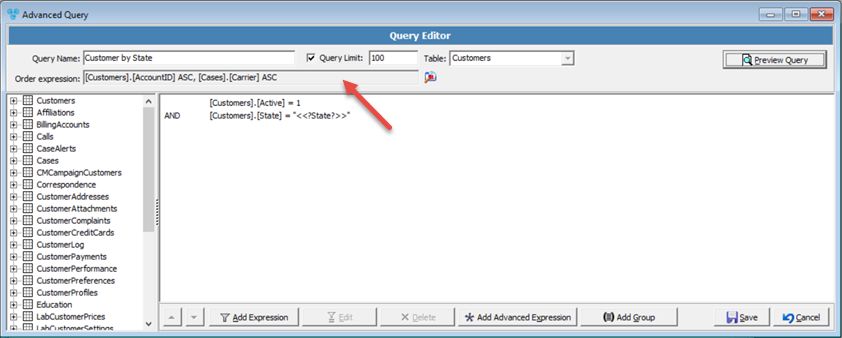
Advanced Query Editor
10. You may Edit or Delete Expressions. Click on the line and select ![]() or
or ![]() . When editing you can change fields values as described above while adding.
. When editing you can change fields values as described above while adding.
11. Add Group – This option allows you to group a set of expressions within another expression.
12. Finally you can Preview Query. Click on ![]()
Preview Query
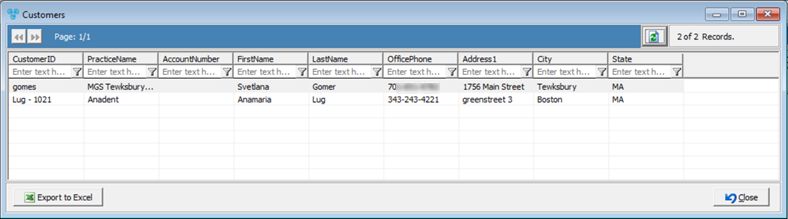
13.All Customers that correspond to the created query are displayed.
14.Click ![]() to return to Advanced Query form.
to return to Advanced Query form.
15.After previewing the query, if you are satisfied with the results in the preview, select ![]() to save the query.
to save the query.
16. In order to have the Query available in Customer form you need to Publish it.
See also: