Advanced Export |

|

|
|
Advanced Export |

|

|
Usage:
With the introduction of Advanced Queries, it has become necessary to provide a more robust Export feature. This option provides the ability to create a template for many data sources and the desired columns to export. The data sources expand to many more tables to pull different types of data from.
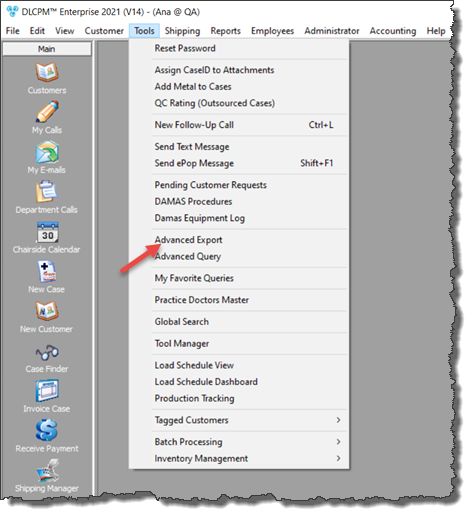
Navigation: Tools > Advanced Export

Advanced Export navigation
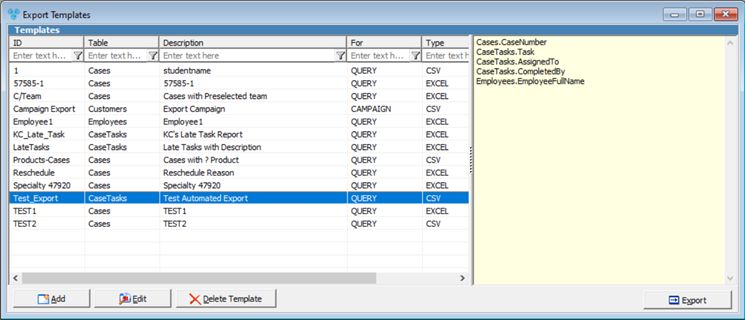
Following form will open:

Export Template form
1.On Export Template form select the Template you want to export by clicking on it. If you do not have the template, you need to add it first. 2.Click on 3.Query Parameters form displays to enter the needed parameters if this is the case. 4.Click OK. 5.Report gets printed. |
1.On Export Template form click
Add Customer Template 2.Set a meaningful ID and Description accordingly. 3.Before you are able to select for a query or campaign, you must select a specific table from the drop down menu. Depending on you selection different Columns will be available to export. Each table has it's own set of columns. See here the list with all tables and columns. 4.There are two options which will allow for you to select from an existing filter query or select for a customer campaign. If you select the option for Export for Query, you may use an existing query that has been published from the Advanced Query Builder. 5.You may select which columns of information you can export. ➢ Click on ➢Select fields to export from Customer form opens. You may change the Column in Available Columns to select different Columns in Customer table. ➢You can Add, Remove, Add all or Remove all. Selected fields will display in the right column.
Select fields to export from Customer form ➢When done click ➢ Select fields to export from Customer form closes. 6.Selected fields are displayed in the Column to Export section. You can arrange the columns by selecting them and clicking the up and down arrows. 7.Enter the path where you would like to save the export file. 8.Select the file format to export (Excel or CSV) . When exporting notepad fields, Excel format is recommended. 9.Check option if you want to Include field names. 10.Click 11. Once a template is saved, it will display on the Export Templates form and users may run the export at any time moving forward. Export templates that are saved will also display in the Export menu from Advanced Query. Please note: The base table controls which export templates will display from the Export option in Advanced Query. |
1.On Export Template form select the template you want to update and click on 2.Make all necessary changes. For each field description please read the Add Export part. 3.Click |
1.On Export Template form select the template you want to remove and click on 2.Select yes when asked for confirmation. |
See also: