Enter Teeth Numbers |

|

|
|
Enter Teeth Numbers |
|
|
Enter Teeth Numbers |
|
|
|
Enter Teeth Numbers |
|
|
When adding product to a Case, if the product is Restoration, user will be prompted to enter the tooth number.
1.On Case Product form , after the Product was selected you can select teeth.
2.Click on Teeth next to the Teeth Numbers field and the Tooth Chart form is displayed
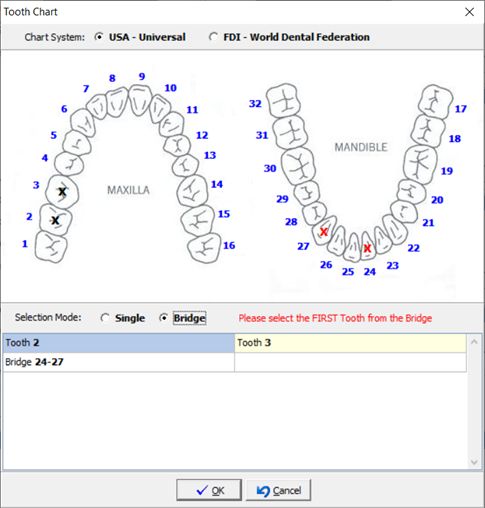
Tooth Chart form
3.Select the Chart System between USA-Universal and FDI - World Dental federation
4.Choose the Selection Mode between Single tooth or Bridge.
5.Select the teeth.
➢If the Selection Mode is Single then simply click on the tooth you want to add. Selected tooth will be displayed on the bottom of the form.
➢ If the Selection Mode is Bridge then select the First tooth of the bridge and then the Last one and you will add all teeth between the selected range.
6.To Remove a selected tooth or a bridge, Right Click on the added record and click on Remove to delete one record or Clear All to remove all.
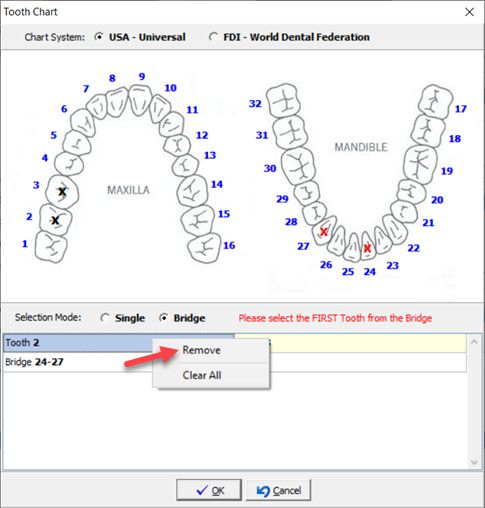
Remove selected teeth
7. Once you established what teeth to add click OK and you will see the teeth numbers in the Case Product form.
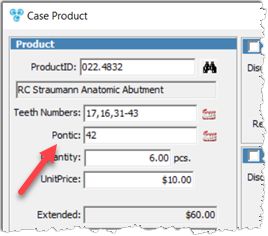
Note: When entering a bridge case, the Pontic option will allow users to select which tooth is the Pontic piece. This is printed under the Teeth Numbers section on the work order.
Teeth are added
8.Click on Teeth next to the Pontic field and the Tooth Chart form is displayed
9.Selection Mode is ONLY Single
10. Select which tooth is the Pontic piece.
Note: Pontic teeth cannot be outside of the bridge.
11. Once you established what teeth to add click OK and you will see the teeth numbers in the Case Product form.
Note: Once the teeth are selected the quantity changes. It becomes equal to the number of teeth selected. Extended also changes since is recalculated.