|
Chronopost |

|

|
|
|
Chronopost |

|

|
Chronopost
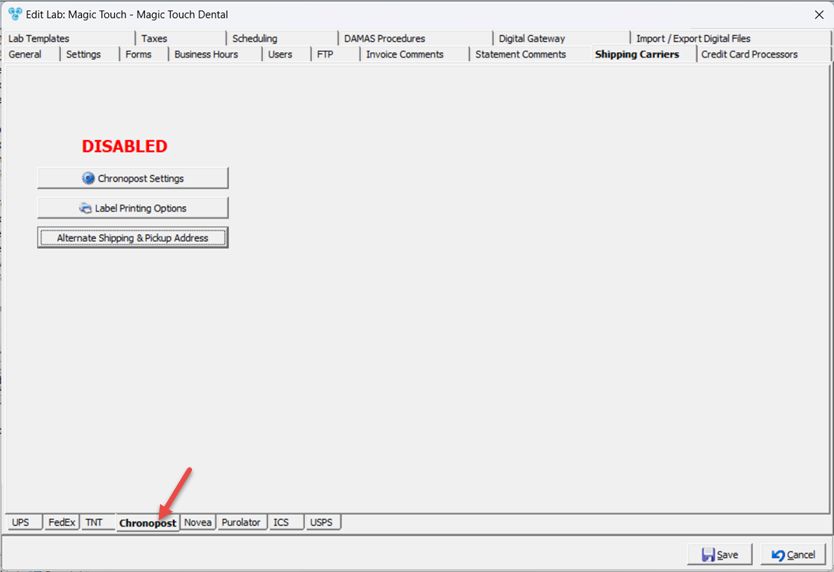
Each Lab may have their own shipping account. These are Chronopost Shipping options:

Shipping Carrier - Chronopost tab
1.Chronopost Settings

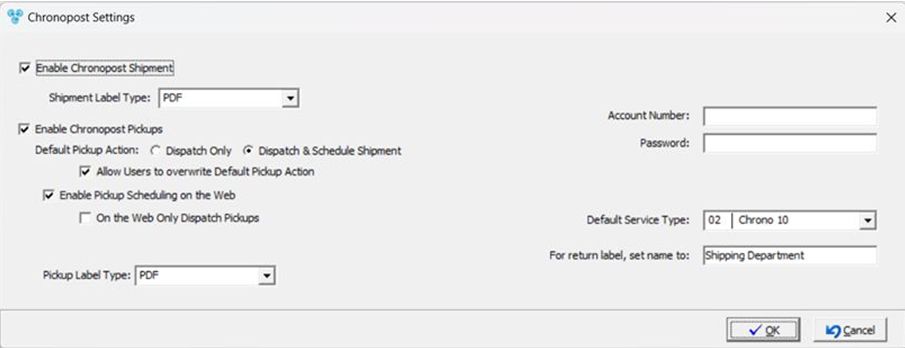
Shipping Carrier - Chronopost settings
2.Enable Chronopost Shipment - to allow shipping with Chronopost. Select Shipment Label Type.
3.You may select the option Enable Chronopost Pickup. Only if this option is enabled is when you are allowed to make further settings for pickups.
➢You will be able to choose which would be the Default Pickup Action between: Dispatch Only or Dispatch & Schedule Shipment
➢Also you may decide if you want to Allow Users to overwrite Default Pickup Action by checking the box next to this option.
➢If you wish to Enable Pickup Scheduling on the Web check this option. If you select this option then you will be able to make two restrictions: On the Web Only Dispatch Pickups.
4.Select Pickup Label Type
5.Label Printing Options:
➢ click on ![]()
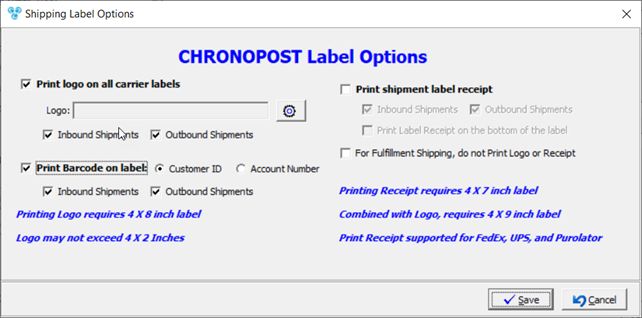
➢Shipping Label Options form displays

Shipping Label Options
➢ Print logo on all carrier labels - printing logo requires 4X8 inch label.
•Enter Logo - Logo may not exceed 4X2 inches
•Select Inbound and/or Outbound Shipment
➢Print Barcode on label - if checked the select on what label to print between Customer and Account Number and select printing for Inbound and/or Outbound Shipment
➢ Print shipment label receipt - check if you need to print shipment label receipt. Following there are some options for this label
• Select printing for Inbound and/or Outbound Shipment
• Print Label Receipt on the bottom of the label - not supported with Novea. Printing Receipt requires 4X7 inch label, combined with Logo, requires 4X9 inch label Print Receipt supported for FedEx, Ups and Purolator
➢ For Fulfillment Shipping, do not Print Logo or Receipt.
➢Click ![]() when done.
when done.
6.Enter if necessary Alternate Shipping and Pickup Address - you can add alternate Outgoing Shipments address and alternate Incoming Pickups addresses.
➢Click on ![]()
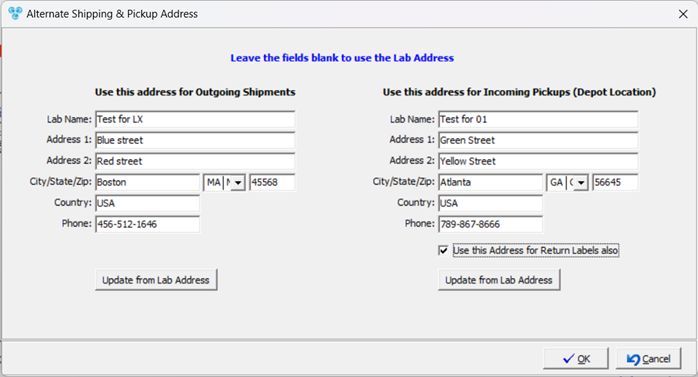
➢Alternate Shipping and Pickup address form will open

Alternate Shipping and Pickup address form
Please Note: If you wish to use the Lab address the leave the fields blank, or use the ![]() button to update Outgoing or Incoming addressees with the Lab Address.
button to update Outgoing or Incoming addressees with the Lab Address.
➢Enter Address for Outgoing Shipments
➢Enter Address for Incoming Shipments (Depot Location)
➢Check Use this Address for Return Labels also if you need the same address for the Return Label.
➢Click ![]() when done.
when done.
7.Enter Credentials:
➢ Fill in: Account Number and Password.
➢ Select a Service Type that will be default type when shipment will is scheduled. Select from the options in the Default Service Type drop down list.
➢For return label, set name to - enter name
See also: